Using Triggers in Google Tag Manager to Control your Tags
Loves Data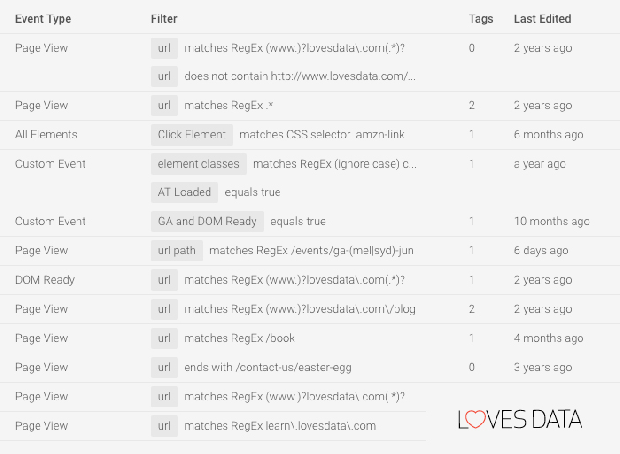
Google Tag Manager (GTM) is an awesome way to create and modify website tags, super easily and quickly. This week we’re talking about GTM triggers, because, although we like to think we’re pretty gangster here at Loves Data, there’s pretty much nothing badass about GTM triggers, in fact, they’re actually awesome.
Haven’t worked with GTM much? Then download our free Getting Started with Google Tag Manager guide:
Get The Google Tag Manager Guide
What is a Trigger in Google Tag Manger?
In GTM, triggers are what we use to determine when a tag should be fired. GTM provides a number of trigger types to help you get set started including page views, clicks and form submissions to name a few. In the most basic use case, if a you want to fire a tag (such as a Google Analytics pageview tag) on every single page of the website, you can use the “All Pages” trigger to do this.
Awesome! But what if you needed to fire a tag under certain conditions? For example, if a user clicks on a link, which link was it? Was it an internal link or an outbound link? You might only want to track clicks on outbound links – you’ll need to specify these conditions.
Setting Up your Trigger
There are a few steps you’d need to go through when creating your trigger:
- Choose an event to fire on (e.g. page view, click, form submission, etc). This defines the intent of the trigger.
- Depending on the event you’ve selected in step 1, GTM may have variations of the event that you can use when configuring your tag. For example, with the page view event, you can specify it to fire as soon as possible (page view), after page content has displayed (DOM Ready) or after the page has completed loaded (Window Loaded).
- Finally, you specify the conditions for your trigger (e.g. fire on all pages, fire on some pages).
So, you want to set up a trigger to respond to outbound clicks. Following the process outlined above:
- You will choose “Click” as the event.
- The “Click” event has two variations: “All Clicks” and “Just Links”. For the purpose of this trigger, select “Just Links.”
- You may have noticed that the additional configuration options “Wait for Tags” and “Check Validation” has appeared. Along with it another step called “Enable When”. If you have these options selected you’ll need to specify when you want GTM to use to these triggers (think of it as specifying a trigger for the trigger). For now, we’ll deselect the checkboxes and ignore this.
- Now we want to specify the conditions for the trigger. GTM helps you get started by suggesting either “All Clicks” or “Some Clicks”. In our scenario, since we are only looking for outbound links, we’ll select “Some Clicks”. The condition will be: “Click URL” + “does not contain“ + your website domain (e.g. lovesdata.com).
Once configured, your tag should look like this:
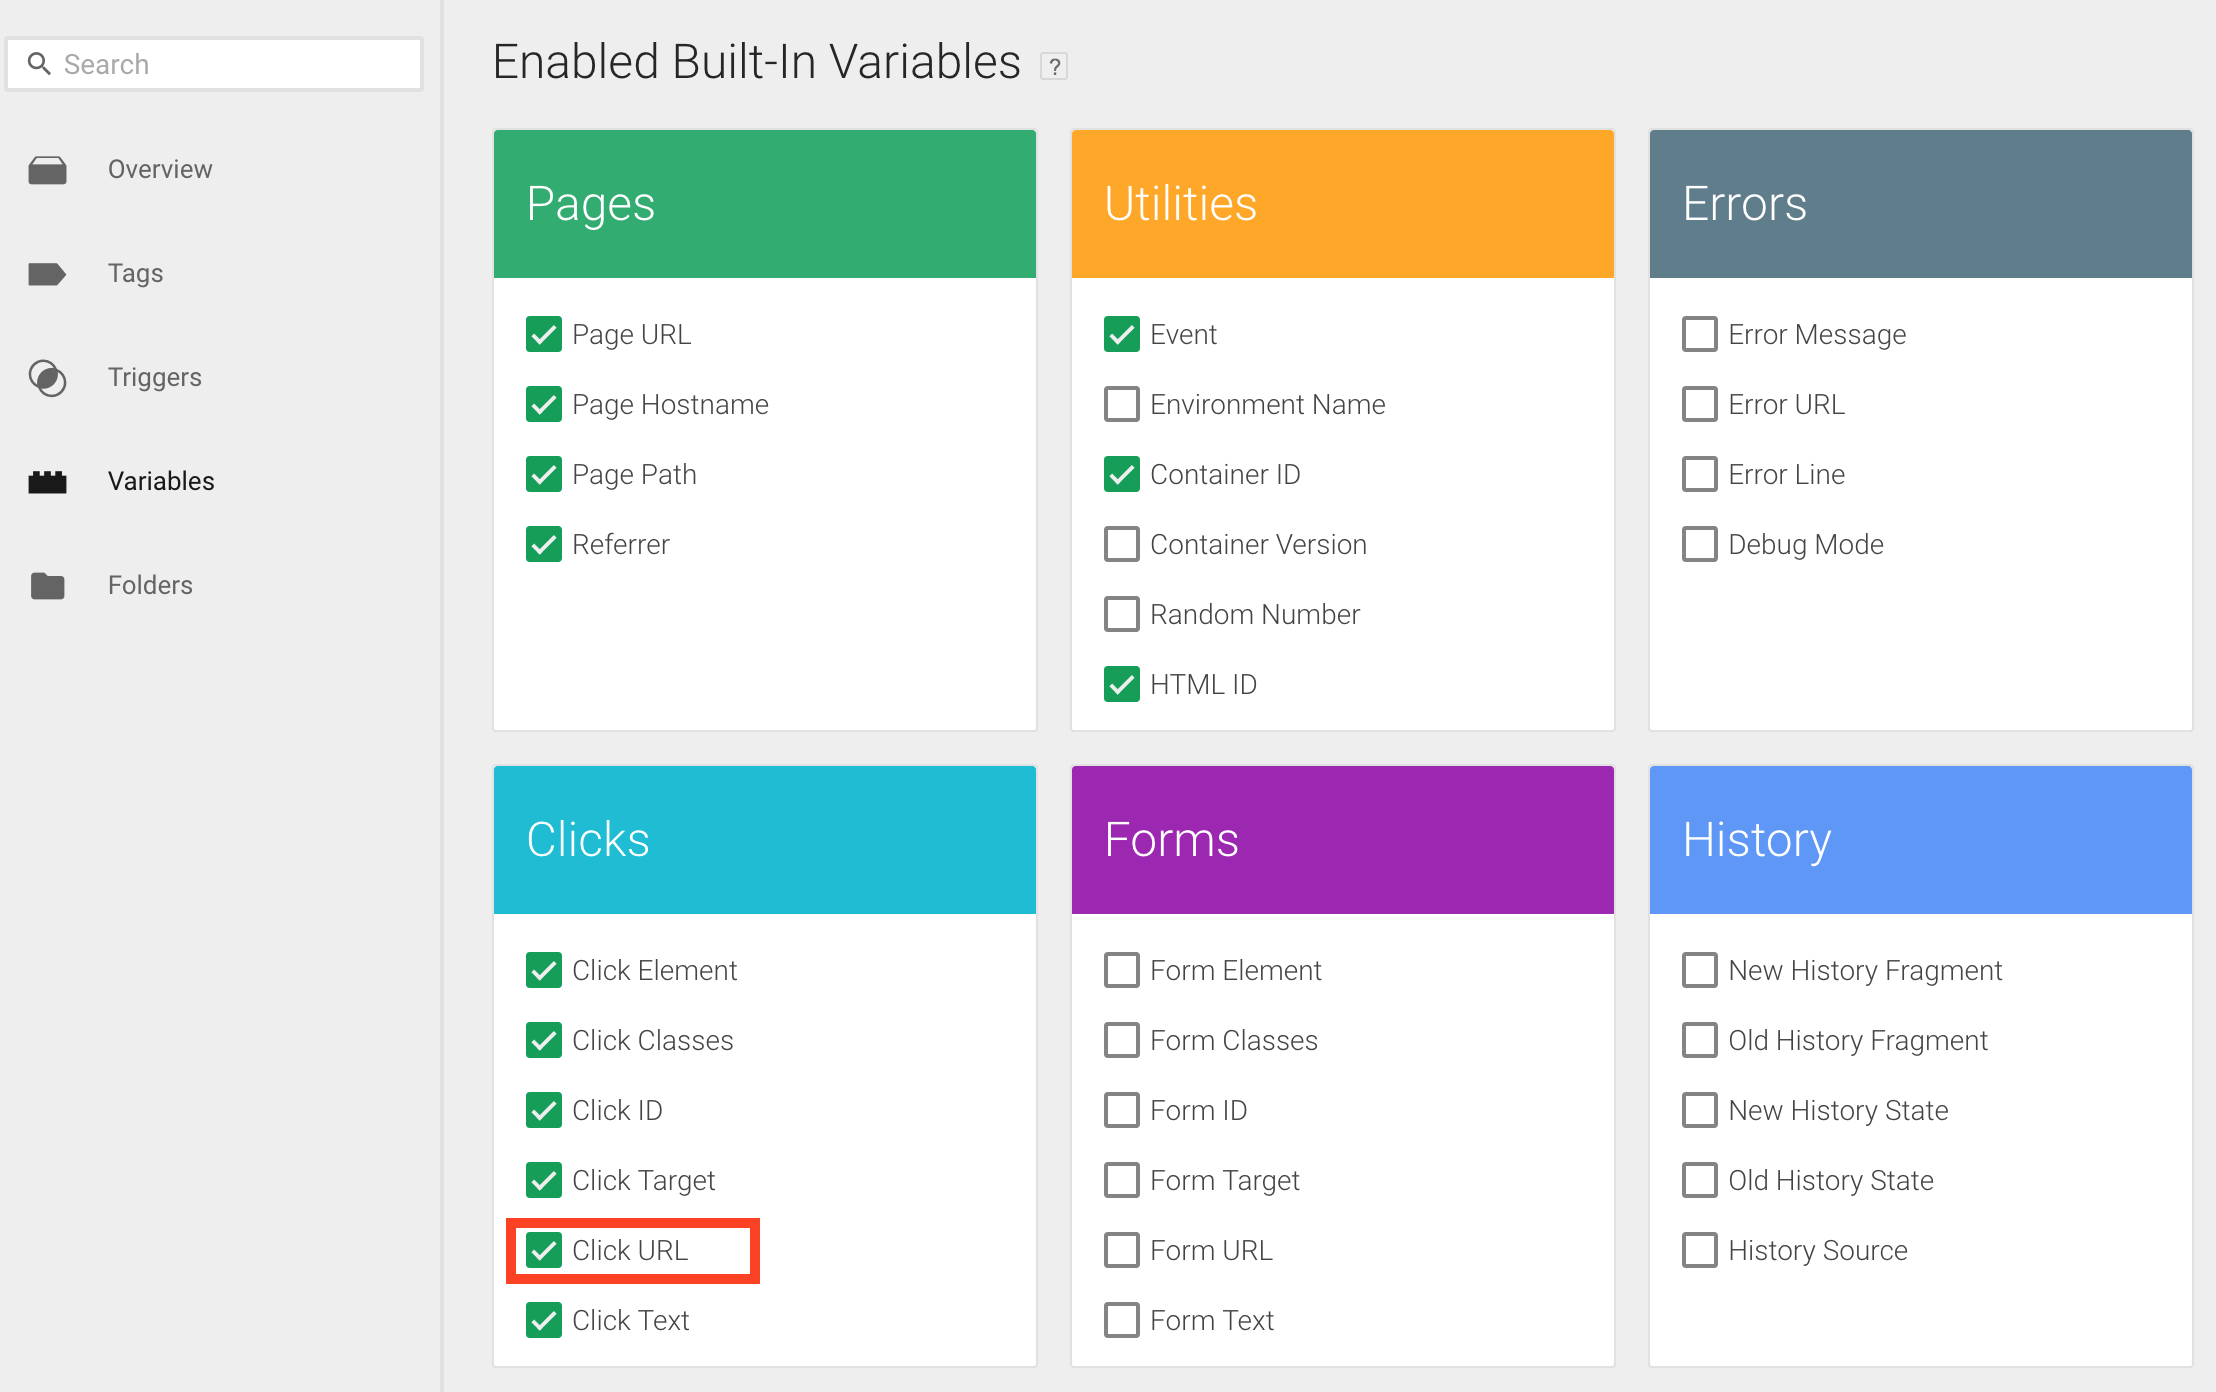
TIP: Can’t find “Click URL” in the first dropdown menu? You’ll need to enable it from the Variables page first.
Using Multiple Triggers
By default, in order for GTM to fire a tag, at least one trigger needs to be applied. However, you can actually apply as many triggers as you like to a single tag and GTM will fire the tag as long as the conditions for at least one trigger is met.
For example, suppose that you have a conversion tag you want to fire on key pages of your website, you can create individual triggers to target the specific pages, and apply them to the same tag. Whenever all conditions of a single trigger are met, the conversion tag will fire for that trigger.
Handling Exceptions
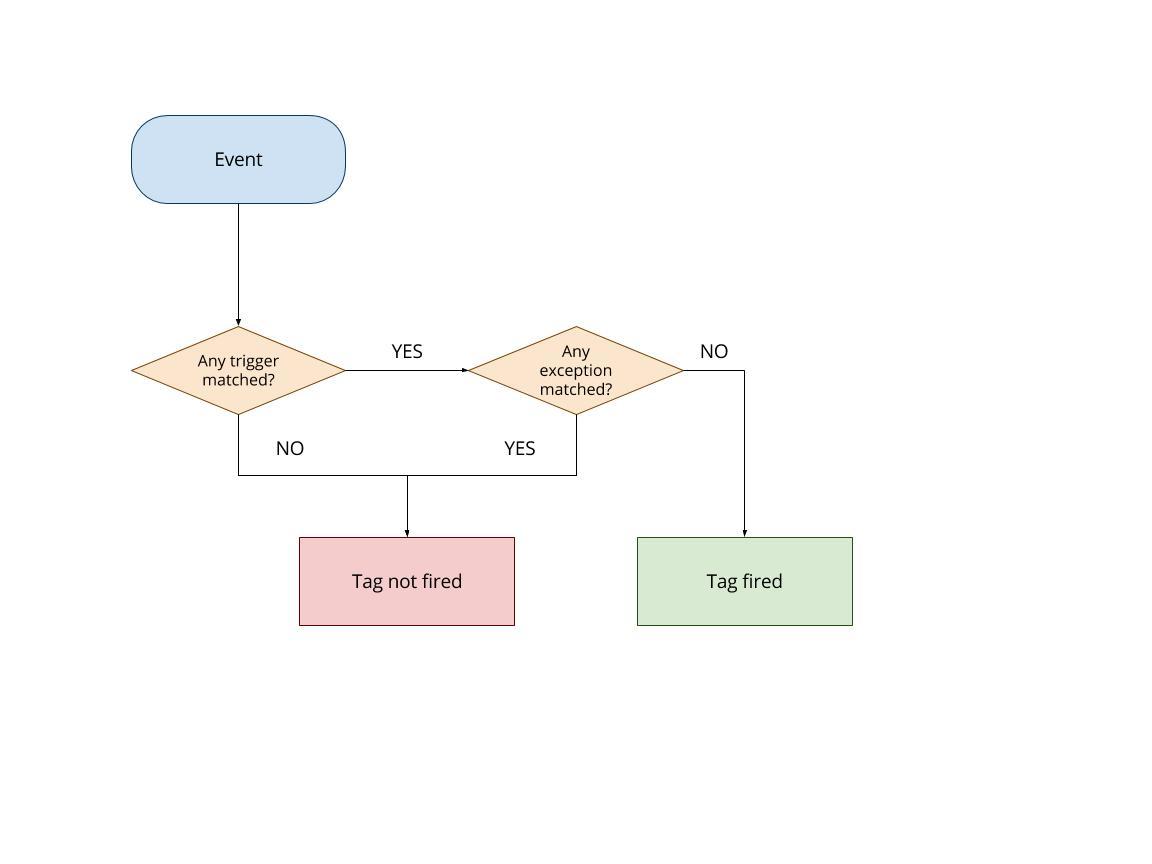
We’ve now seen how triggers are created, and how we can apply multiple triggers to a single tag. GTM provides one use-case for triggers, that allows you to explicitly prevent a tag from firing – this is known as an exception.
Fundamentally, triggers and exceptions are exactly the same, you create them the same way, they work the same way and you can even use a trigger as a fire on trigger or as an exception at the same time. The only difference is that one will fire the tag, and the other will prevent it. So how does GTM process this?
Firstly, GTM will take into the trigger event into consideration. If an exception shares the same event with at least one of fire on triggers, then it will observe the conditions of all triggers. Finally, if the conditions of the exception are met, the tag will not fire, even if the conditions of fire on the trigger are met. However, if the conditions of the firing trigger are met, and the exception isn’t, the tag will fire normally.
Caveat
An exception will be ignored when its event doesn’t match the event of one of the firing triggers. For example, if you had an exception with a “Click” event and a fire on the trigger with a “Page View” event, the exception will be ignored.
And that’s it! Still hungry for more GTM triggers? Stay tuned for the next episode: GTM custom event triggers and check out Loves Data’s Google Tag Manager course in the meantime.
Comments