How to Install Google Tag Manager on Shopify
Loves Data
Important Update
While you can still use the method covered in this article to install Google Tag Manager on your Shopify store, we recommend implementing a Shopify Custom Pixel for better compatibility with your Shopify theme, along with added security.
Want to install Google Tag Manager on your Shopify store? This article includes the steps and code you’ll need to add Google Tag Manager and send purchase events to Google Analytics 4 (GA4) if you’re using the standard version of Shopify.
Plus, here’s our tutorial to walk you through the steps:
Important: If you’ve already added the Google Analytics 4 (GA4) tracking code (gtag.js) to your theme.liquid file and to the order confirmation page, then you will need to remove these so you’re not sending duplicate events.
Important: While we’ve tested this solution and it worked for us, we can’t guarantee it will work for your Shopify store. We recommend you perform your own debugging and testing.
1. Add Google Tag Manager to your theme
Navigate to ‘Online Store’, then ‘Themes’, and edit the theme.liquid file. You will then need to paste your Google Tag Manager container code between the head tags. Here’s an example of the code (important: you will need to replace GTM-EXAMPLE with your own Google Tag Manager container ID):
2. Add Google Tag Manager with a data layer to your order confirmation page
Navigate to ‘Settings’, then ‘Checkout’, add a modified tracking code to the ‘Additional Scripts’ section (under ‘Order Status Page’. Here’s an example you can use (important: you will need to replace GTM-EXAMPLE with your own Google Tag Manager container ID):
3. Exclude Shopify as a referral in GA4
To ensure that your sales are attributed to the correct marketing channels, you will need to prevent the Shopify checkout pages from showing up as referrals in your reports. To do this, open your data stream in Google Analytics, then choose ‘More Tagging Settings’ and select ‘List Unwanted Referrals’. You will then need to enter myshopify.com as an exclusion.
⚠️ Important consideration (don’t skip this)
Please, please remember that the standard version of Shopify does not let you add code to the checkout steps, so the reason we’ve completed step three above is to ensure these missing steps don’t negatively impact your data and reports. This means that if you add any other tags to your Google Tag Manager container, they will also be missing from the checkout steps. You will need to consider this for all other tags you add using Google Tag Manager. This can and will impact what those tags track and report.
4. Configure your tag, trigger, and variables in Google Tag Manager
Inside Google Tag Manager, you will need to configure your tag, trigger and variables to send data to GA4. You can find all of these listed below, or you can get our pre-configured container.
Variables:
You will need to create user-defined variables to pass the details of each transaction to Google Analytics. For example, the ‘Ecommerce Items’ variable should look like this:
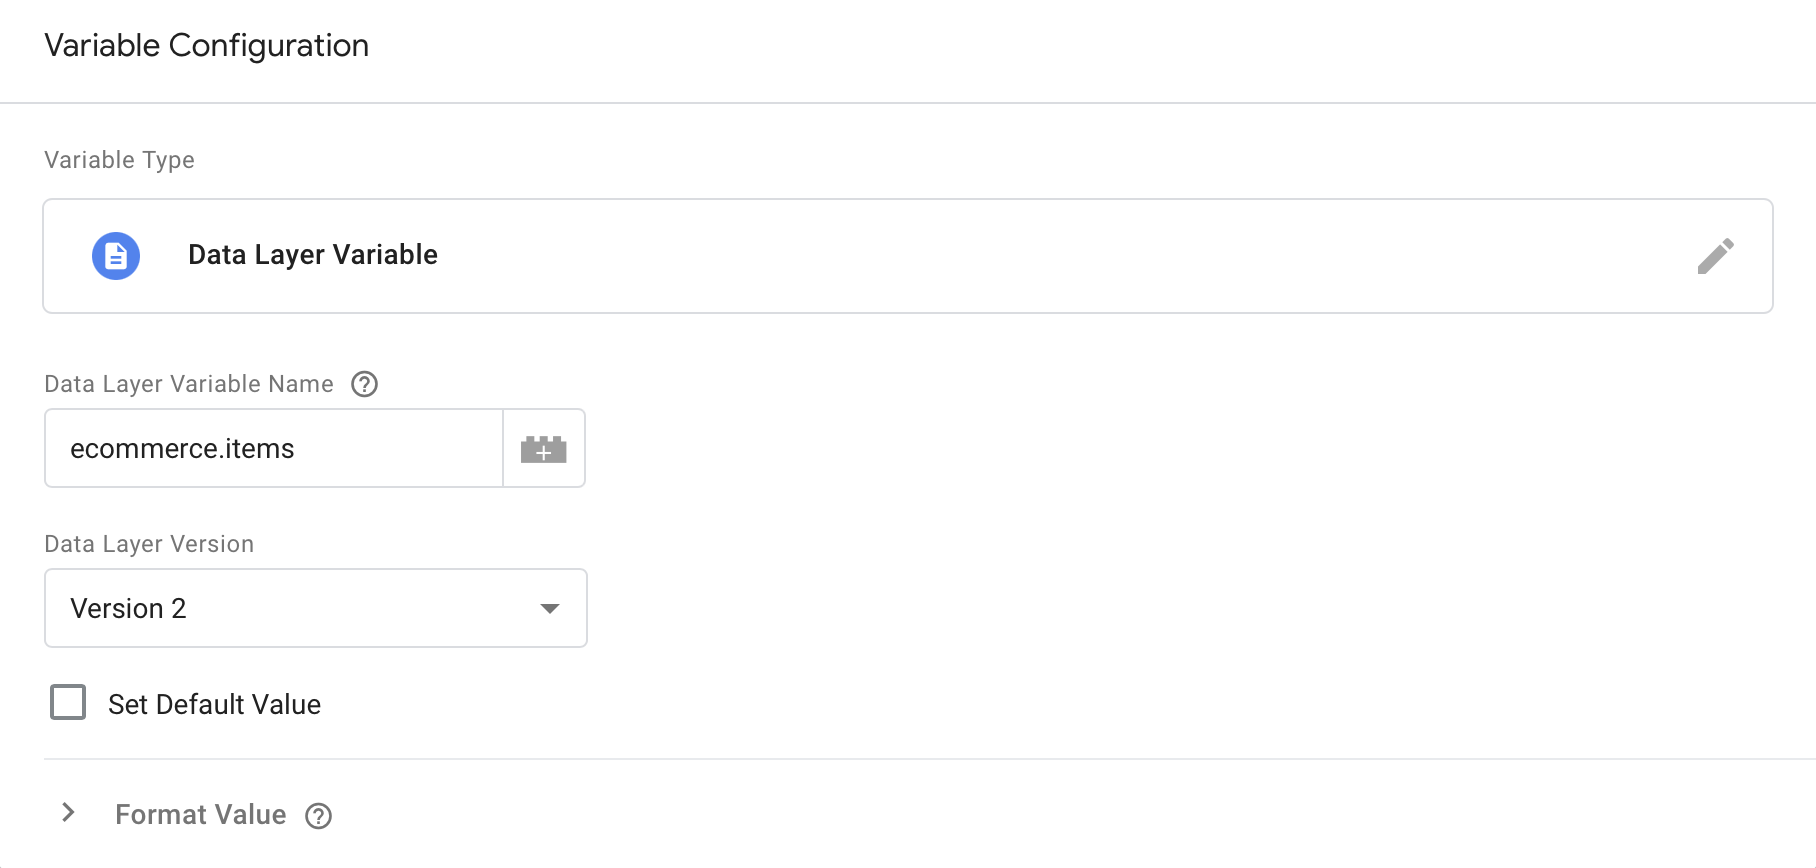
Here are all the variables you will need to configure:
| Name | Data Layer Variable Name |
|---|---|
| Ecommerce Items | ecommerce.items |
| Ecommerce Transaction ID | ecommerce.transaction_id |
| Ecommerce Value | ecommerce.value |
| Ecommerce Tax | ecommerce.tax |
| Ecommerce Shipping | ecommerce.shipping |
| Ecommerce Currency | ecommerce.currency |
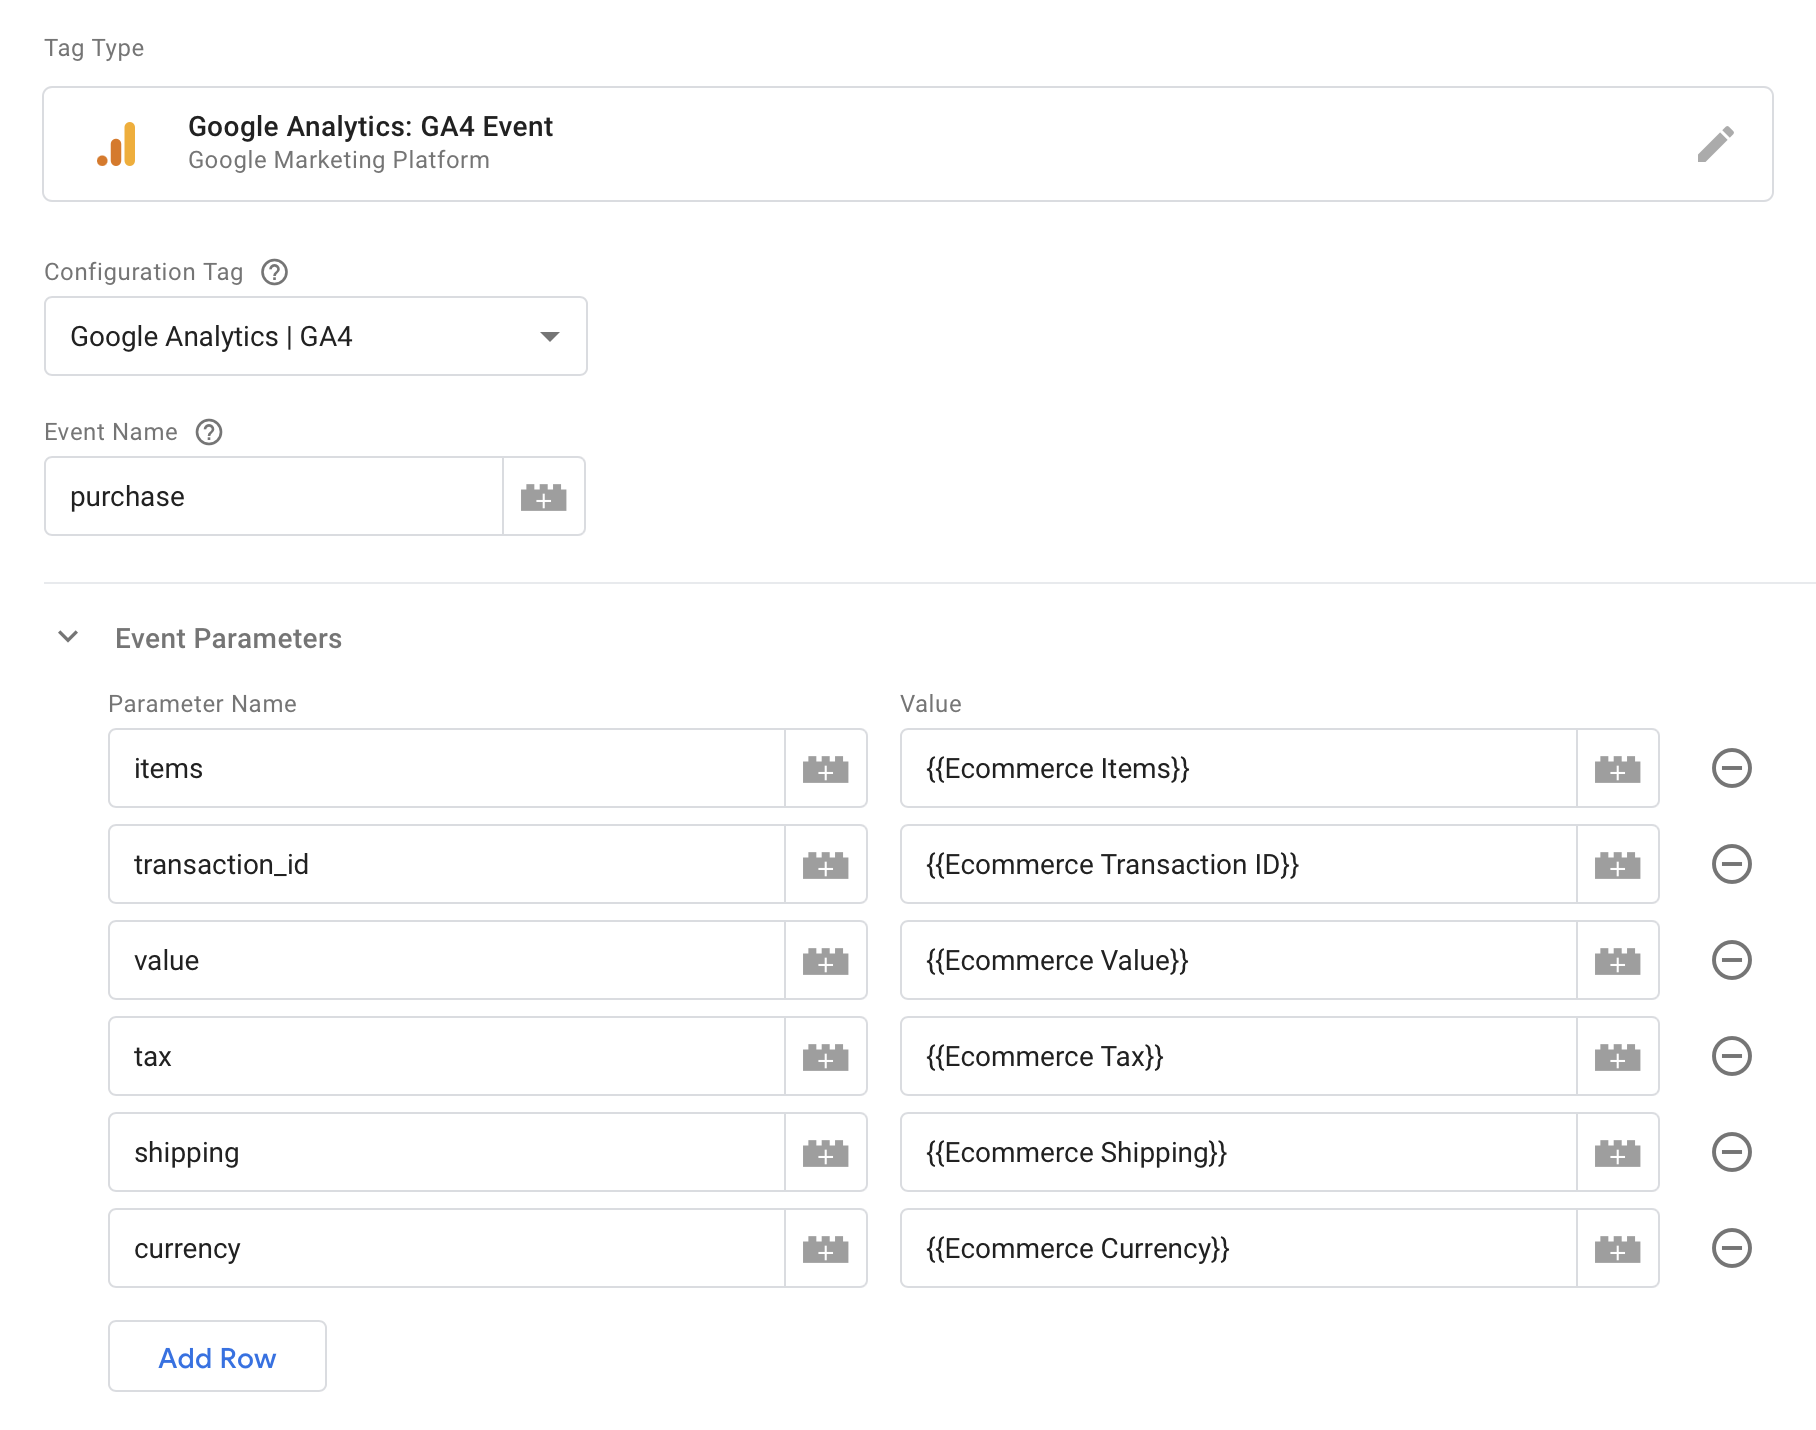
GA4 Event Tag:
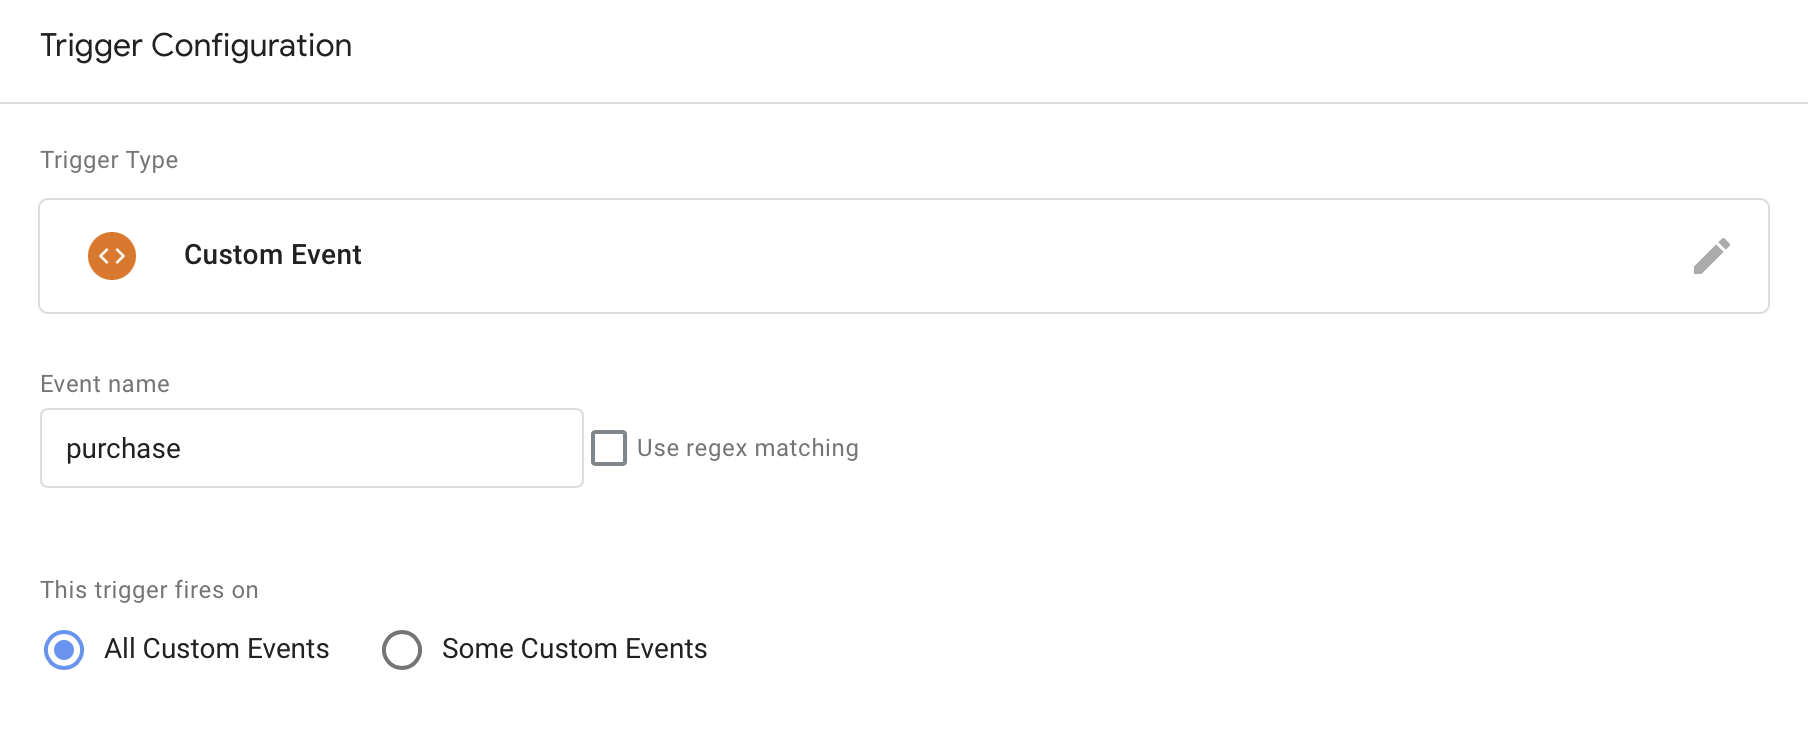
Trigger:


Comments