How to correctly configure goals and funnels in Google Analytics
Loves Data
Understanding how well your website is meeting its objectives is critical, and goals inside Google Analytics allow you to understand if people are converting on your website. In most cases you should be able to get up and running quickly.
Once configured, you’ll find conversion data in your Google Analytics home report:
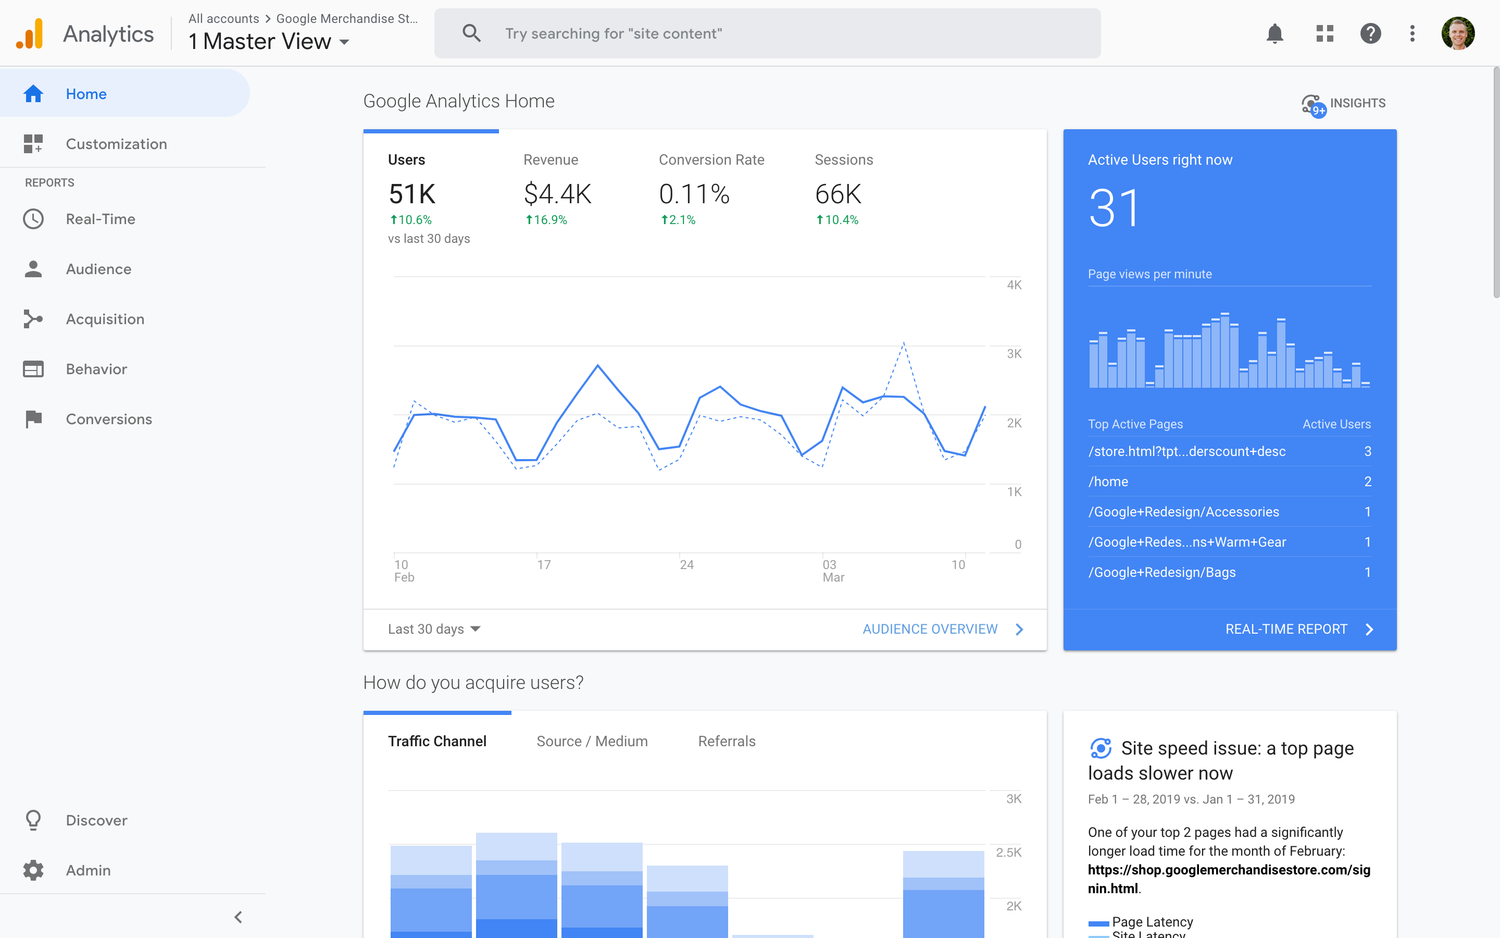
You’ll be able to access conversion metrics like Goal Completions and Goal Conversion Rate:

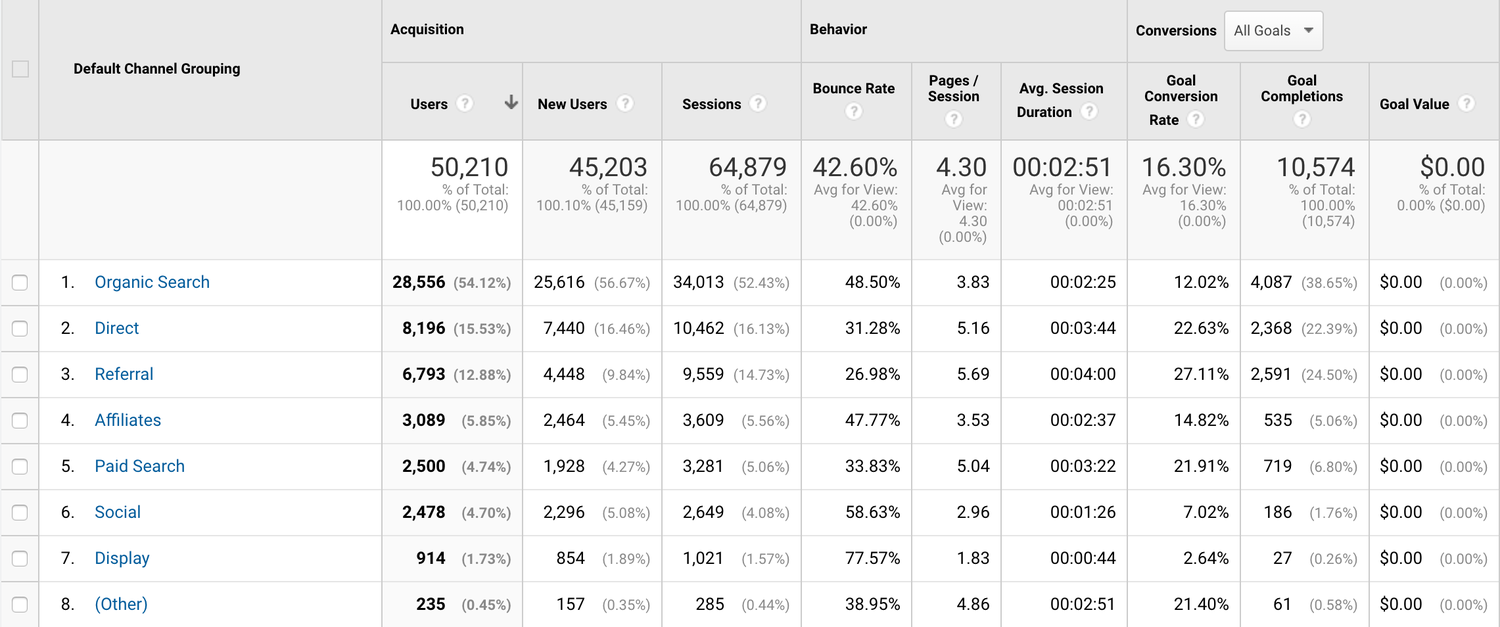
And you’ll find conversion metrics reported under the ‘Conversions’ columns in your reports. Here we can see conversions being reported on the right for our different marketing channels:
So whether you’re starting from scratch, or already have some goals set up within Google Analytics, it’s worth taking a few minutes to double check that everything is configured correctly.
When should I use a goal in Google Analytics?
Along with ecommerce conversions, goals are a primary means for Google Analytics to report on your website’s success. It’s a good idea to set up goals for actions that reflect the top-level objectives for your website – you can have up to 20 goals per view, so don’t hold back.
Every website is different, but some goals you might want to configure include:
- Subscribing to email updates
- Submitting a contact form
- Registering to receive a resource
- Member signups
- Scheduling an appointment
- Website registrations
- Watching embedded videos
If you’re struggling to work out what the goals should be for your website, think about how you would end the statement “I want people to come to my website and…” This is a great way to begin goal planning.
Are goals in Google Analytics retroactive?
Unfortunately, no, they’re not retroactive. A goal needs to be configured before you will start to see data appearing in your reports. This is why goals should be configured as early as possible and why you should also review your goals throughout the year. Ensuring your goals continue to reflect your objectives and are configured correctly is an important part of keeping your Google Analytics implementation up to date.
Types of goals
There are four types of goals that you can set up in Google Analytics:
- Destination goal: a particular web page is viewed, for example, a ‘thank you’ page for a newsletter subscription.
- Duration: a session has lasted for a certain length of time, for example, 10 or more minutes.
- Pages per session: a minimum number of pages have been viewed by the user during the session.
- Event: something has happened that you have coded into your website to send to Google Analytics as an event. For example, the user has clicked on a link to a social media service.
- Smart Goal: this type of goal will automatically count conversions for the most engaged users on your website. You’ll need to have Google Ads linked to Google Analytics, and at least 500 clicks from your ads for this option to be available. It uses Google’s machine learning to determine if a conversion should be counted.
Getting started
We’re going to walkthrough the steps to configure the most common goal – a destination goal. This is where someone has viewed a particular page on your website, perhaps a ‘thank you’ page shown after they have subscribed to receive your email newsletter.
Start by going to your website and navigating through it, completing the steps you’d expect are needed to arrive at the thank you page. As you go, record the URLs of the pages you visit, all the way to the thank you page. Here’s an example of what the steps might look like:
- https://www.site.com
- https://www.site.com/news/
- https://www.site.com/news/subscribe
- https://www.site.com/news/thank-you
In this example, the user would go to your homepage, then to your news section, on to the newsletter subscription form page, and finally to the thank you page.
In this case, the destination page that you will configure for your goal is the last one (the thank you page), because that is ultimately what you want to count as a newsletter subscription conversion.
Setting up your goal
First, confirm that you have the correct level of permission to add goals. Only users with edit-level permissions are able to add goals to a reporting view.
Step 1. Navigate to ‘Admin’ in Google Analytics.
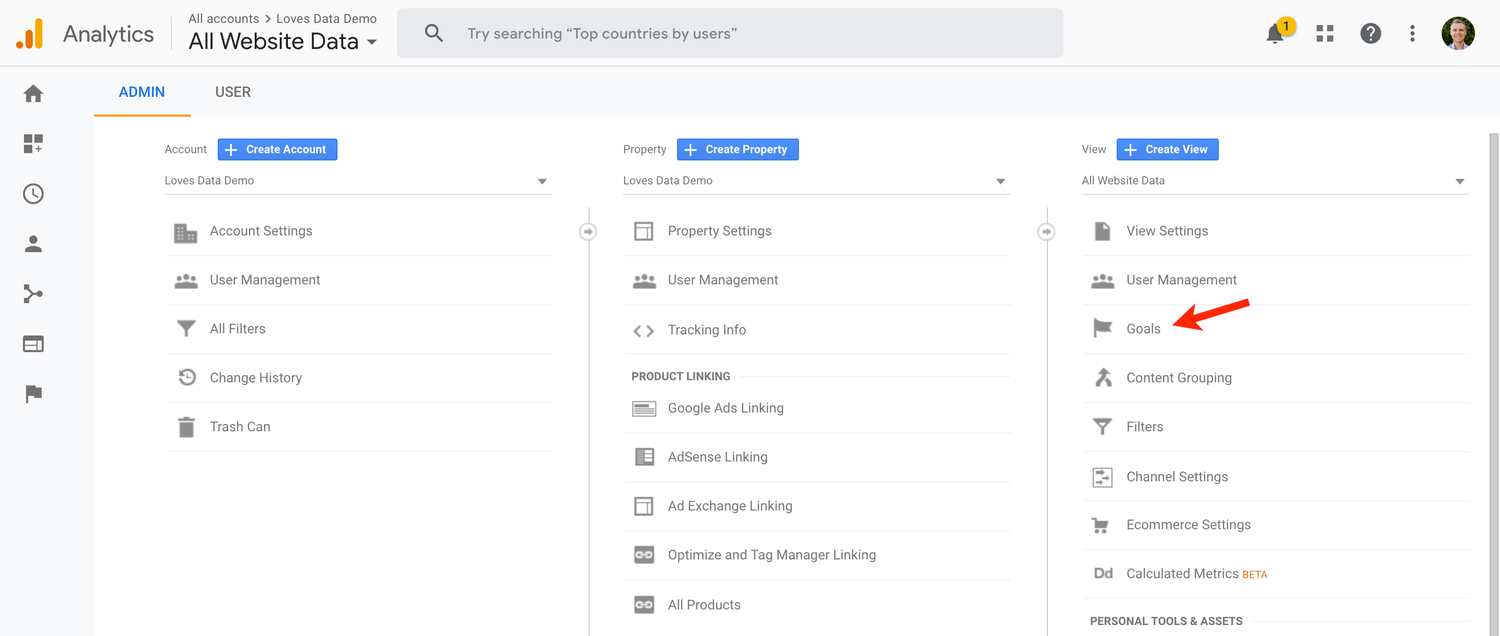
Step 2. Select the reporting view where you want to add a goal.
Step 3. Select ‘Goals’.
Step 4. Click ‘Add New Goal’.
Step 5. If you see goal templates, then I recommend selecting ‘Custom’. Then click ‘Continue’. This allows you to define your own goal from scratch.
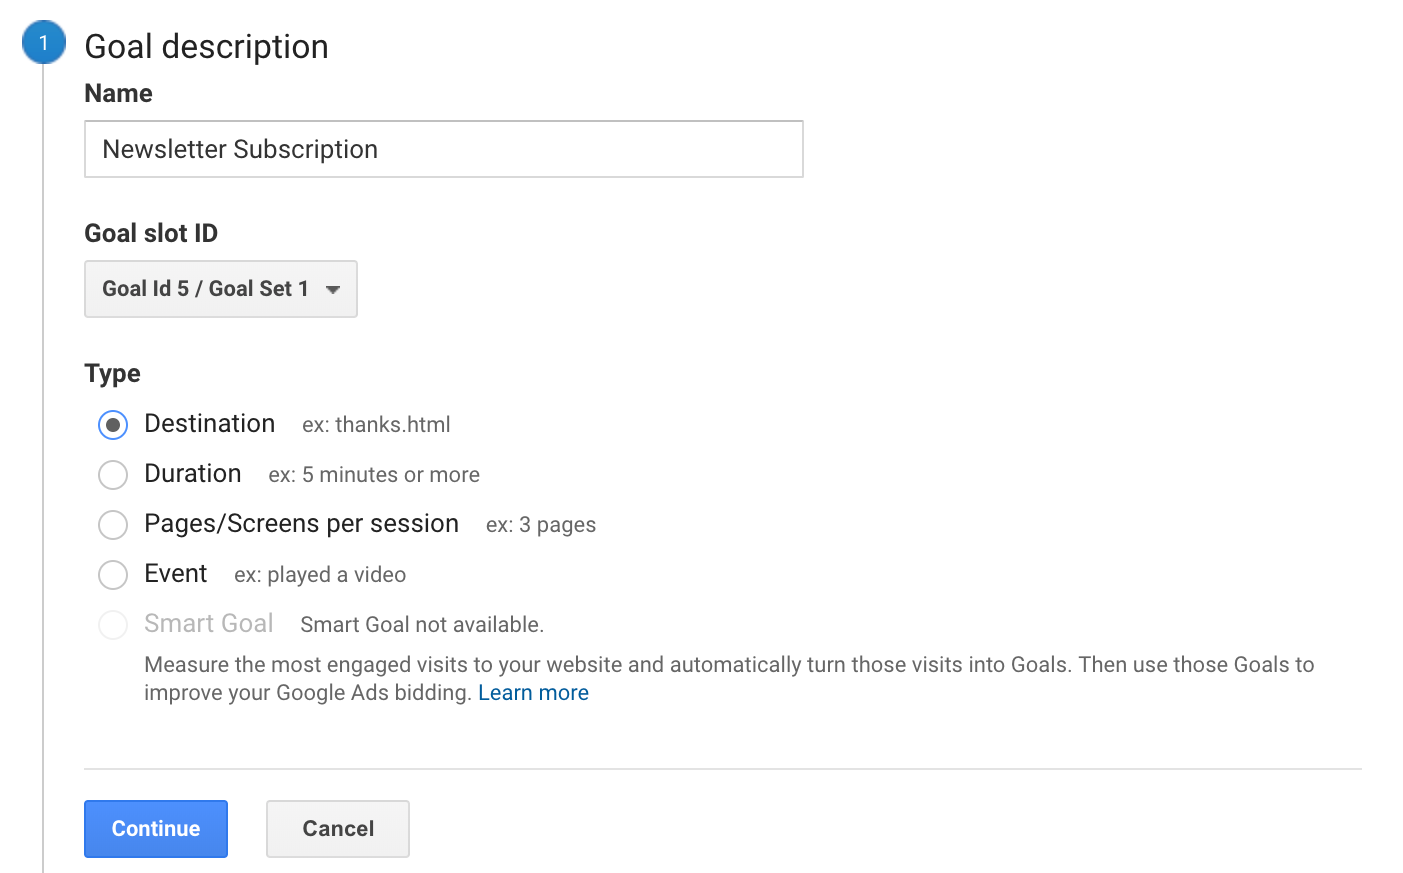
Step 6. Give your goal a clear and concise name.
Step 7. You can choose a ‘Goal Slot ID’ which allows you to group goals in your reports. This is purely cosmetic, so if in doubt, just leave the default selection.
Step 8. For type of goal, click ‘Destination’. Then click ‘Continue’.
Step 9. Enter the page path of the final URL that you noted earlier (in my example this was /news/thank-you) as the ‘Destination’.
Ideally, this should be a page that people will only see if they have completed the goal. Since a goal conversion will be reported whenever this page is loaded, you don’t want your conversion figures to be inflated by pageviews that are not genuine goal completions.
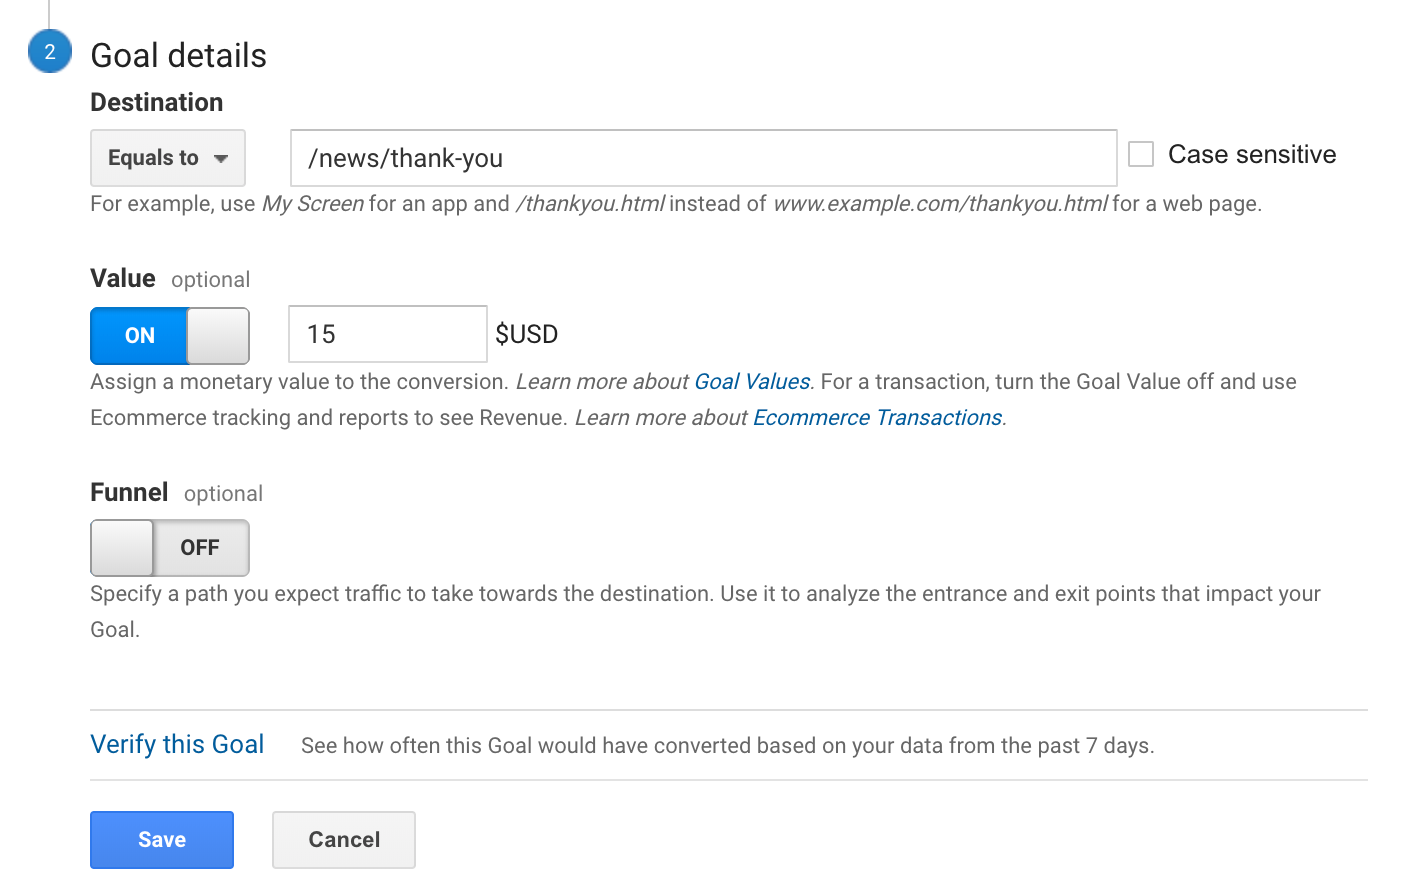
Step 10. Adjust the match type if necessary. When setting the destination (or final URL) you will notice that it says ‘Equals to’ by default. You can change this to control the way Google Analytics will (and will not) match your URL. The options are:
- Equals to: matches the URL exactly. For example, if you enter /thank-you then conversions will be counted when someone views /thank-you but not when people view /thank-you?id=18 or /thank-you/email
- Begins with: matches the URL even if there are additional details following the URL. For example, if you enter /thank-you then conversions will be counted when people view /thank-you or /thank-you?id=18 or /thank-you/email
- Regular expression: matches the URL based on regular expressions. For example, entering /thank-you\?id=(news|contact) will count conversions when people view /thank-you?id=news or /thank-you?id=contact
Step 11. Assign a dollar value to your goal conversion. Although this is an optional setting, it’s a really great idea to enter a dollar value for your goal – the value you enter will be included in your reports, and it will provider deeper insights into the performance of your website.
Read my post on setting a goal value for a complete rundown.
Here’s a quick example; if your website generates leads and you receive 100 leads which result in $5,000 of value to your business, then each lead is worth an average of $50. In this case we would enter $50 as the goal value.
Step 12. Since we selected ‘Destination’ as our goal type, this means we can define a funnel. This is simply the pages we expect people to view before they convert. By taking the time to define these steps we will be able to make use of the Goal Flow and Funnel Visualization reports inside Google Analytics.
You should only include steps that are directly tied to the conversion action, so continuing my example, I’m going to skip the homepage and the news page and only enter one funnel step. I’m going to enter /news/subscribe and name the step.
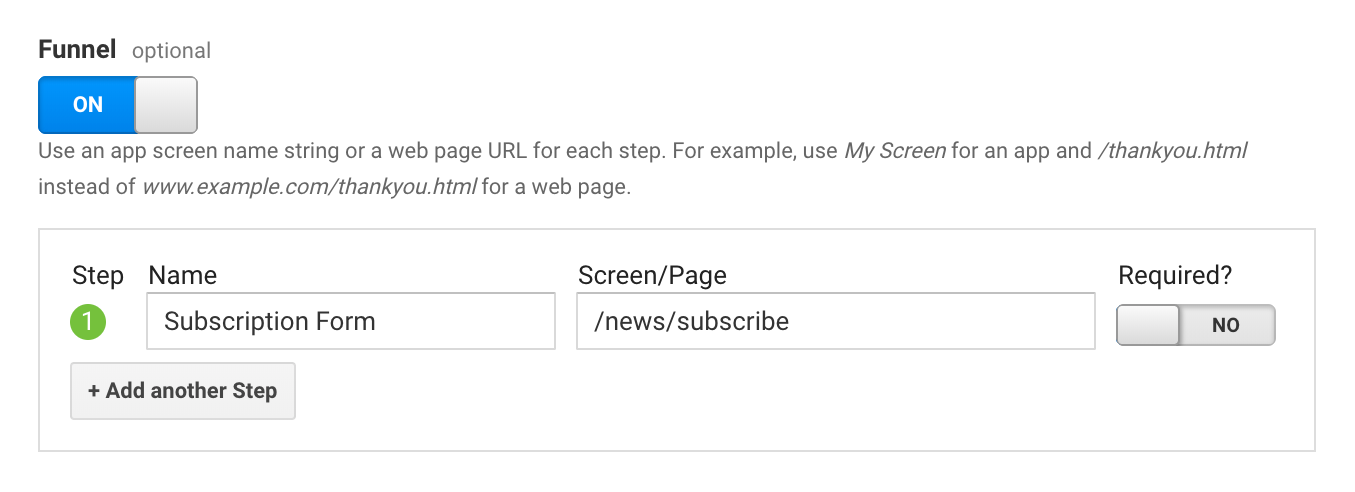
Note: A goal conversion will still be reported whenever the destination page is viewed, even if the funnel steps have not been completed.
I also recommend leaving ‘Required’ set to ‘No’. If you’d like to learn more about this setting then you can read my post on the required step goal setting.
Step 13. Click ‘Verify This Goal’ and check that the goal conversion rate looks accurate based on the data from the previous seven days. If the goal conversion rate doesn’t look quite right or is showing zero, then you’ll need to check the configuration for your goal.
Step 14. Click ‘Save’. Your goal is now tracking and ready for use. Now you just need to wait for goal conversion data to begin appearing in your reports.
You’re done! That’s it!


Comments