Audiences in Google Analytics
Loves Data
What Are Audiences?
Audiences are a group of your users defined by certain conditions. In Google Analytics 4 (GA4), these rules can be based on dimensions, metrics, and events. In addition to these, you can create AI-powered audiences and make the most of your data.
Audience definition on GA4 allows you to focus on the important sections of your users to perform in-depth analysis and make comparisons between your different segments. You can also utilize your GA4 audiences in platforms like Google Ads for remarketing.
For example, if most of your business comes from people located in San Francisco, then you can start by creating an audience that just includes people who are physically located there. This way, when you look at your GA4 reports, you can only see data for your audience members from San Francisco, compare your San Francisco users with other users, and get better results on your retargeting campaigns.

Audience Builder in GA4
Creating audiences in GA4 is straightforward, thanks to the user-friendly audience builder interface. To find it, all you need to do is to go to the Admin section by clicking the button on the lower-left side of your GA4 interface, then you’ll find it listed in 3rd place under the Data Display section. There you’ll find 2 audiences that were built-in: all users and purchasers. These audiences are created automatically with every new GA4 property.
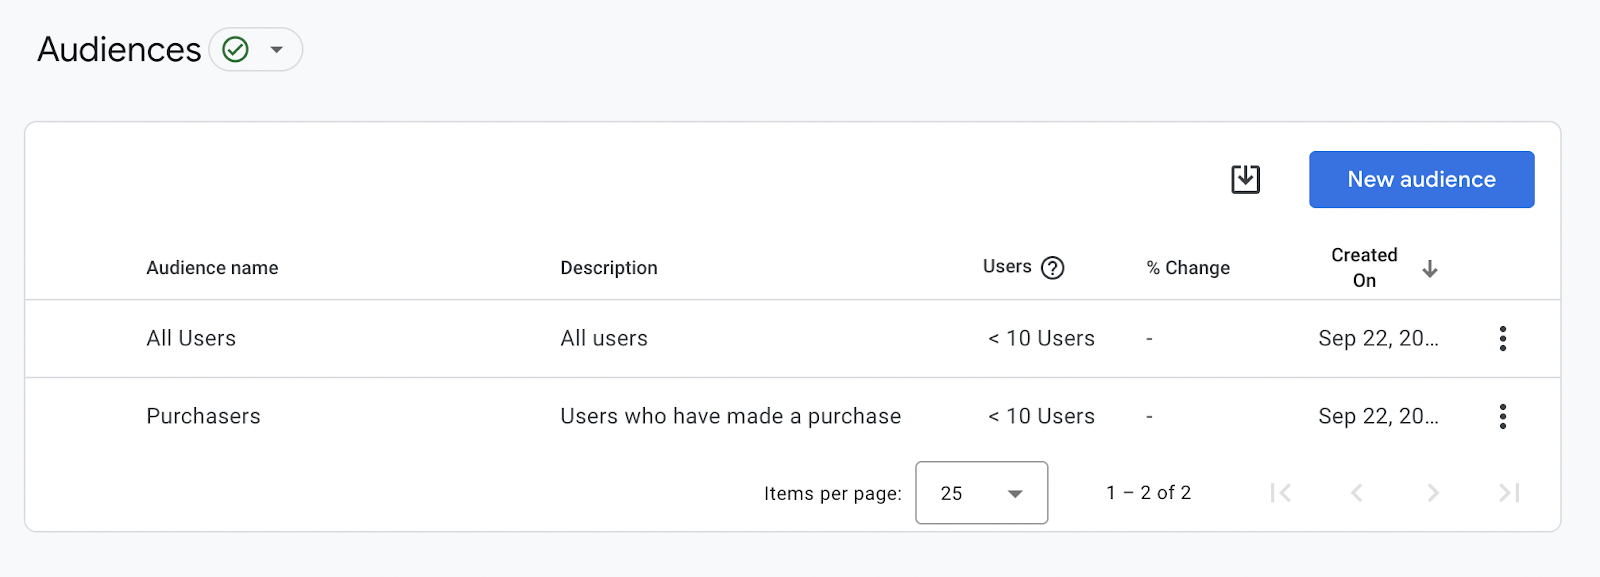
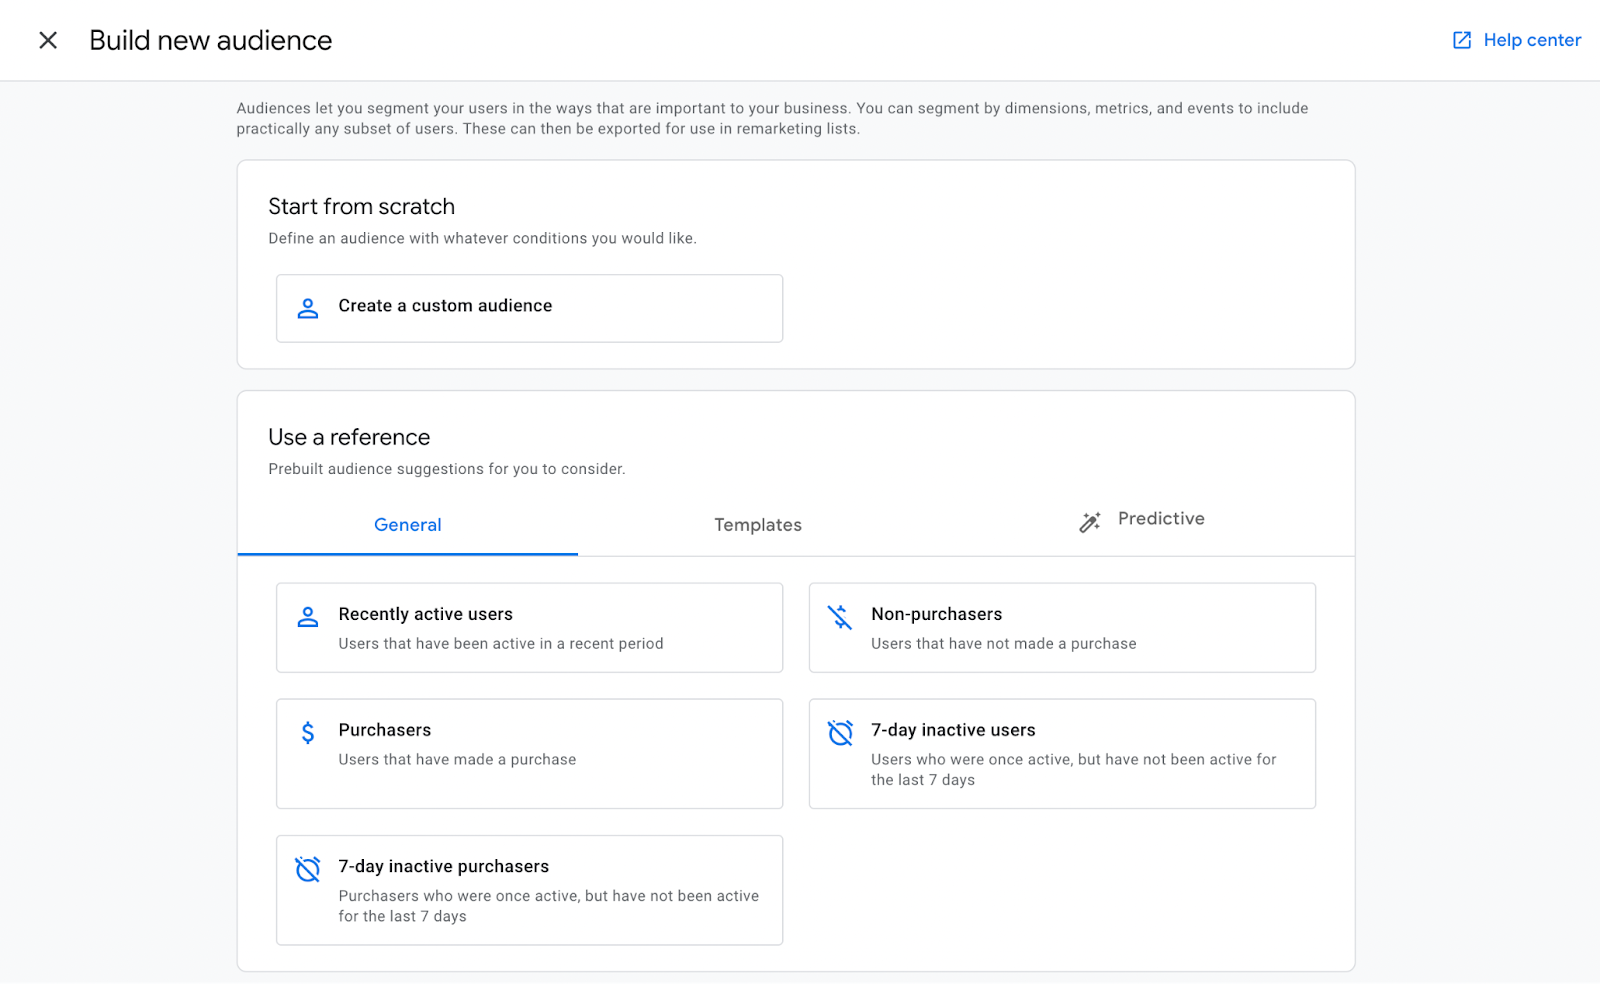
Creating your own audiences is quite simple. On the upper right side, you’ll see the shiny blue button that says ‘New Audience’. Upon clicking that button, you’ll be met with the interface below. You can either create your audience from scratch or utilize some suggestions to create your audience lists faster.
Creating a GA4 Custom Audience from Scratch
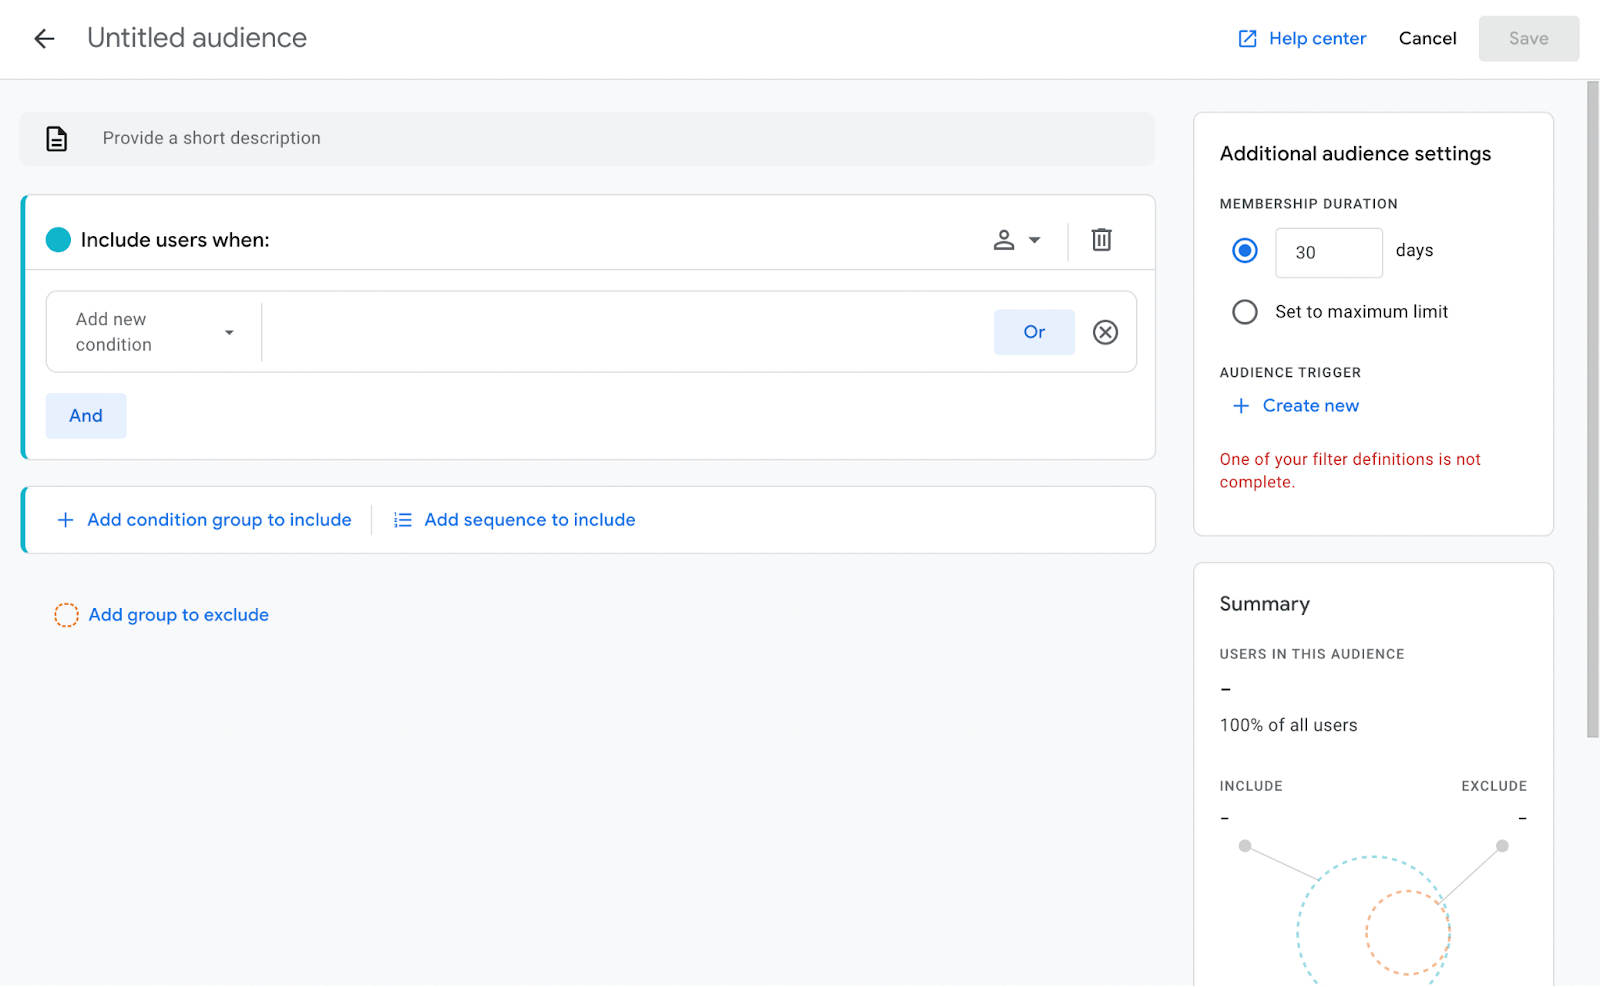
Creating a custom audience allows you to have control over the conditions you’re setting to filter your desired group of users as well as audience settings such as membership duration. It is best practice to keep the audience title as brief as possible and explain the details in the description.
In the audience configuration interface, you’ll find a card that says ‘Include Users When’ at the top. This card allows you to set conditions to include users in your audience. If you want to create an audience based purely on excluding a certain group of users, you can remove this card and add a new group to exclude users from your audience temporarily or permanently based on at least one condition.
Both inclusion and exclusion cards have similar interfaces. You can add conditions based on events, dimensions, and metrics. After adding a dimension or a metric, you will be expected to specify a rule for filtering. However, adding an event will be sufficient if you wish to include users who have triggered the selected event. You can still filter further by selecting a parameter of the event of your choice, but it’s optional.
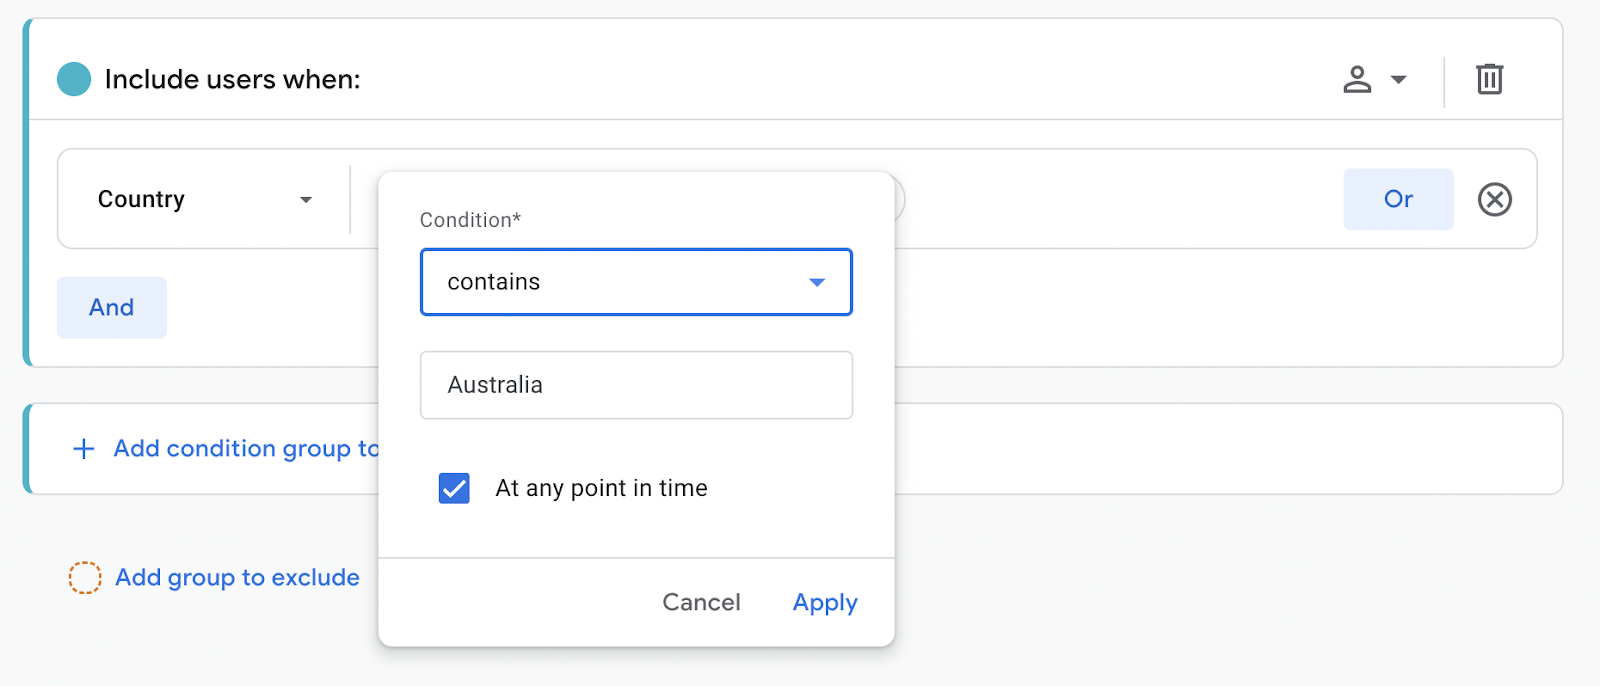
For example, if you wish to create an audience that only includes users from Australia, you’ll need to select the ‘Country’ dimension when adding a condition, and you will need to complete a filter definition afterward. In the filter definition window, you can filter by Australia using “exactly matches” or one of the other suitable comparison operators.
Sequence scoping is when you specify if you want to include users who fulfill the conditions across all of their sessions or a single session. You’re also not limited to only one condition. You can create chains by using the ‘Or’ or ‘And’ buttons, add more condition groups, and add sequences. Sequences are especially useful if you have a multiple-step funnel on your website. It can be a classic e-commerce funnel as well as non-ecommerce structures such as a lead magnet funnel. You can add as many as 10 steps, choose which steps directly or indirectly follow the next ones, set time constraints, and add step scoping for each step.
The interface also allows you to select the duration of membership for once the users join the audience, log an event when a user joins the audience, and preview an estimated amount of users that would’ve joined this audience based on last 30 days’ data.
Using a Reference to Create an Audience
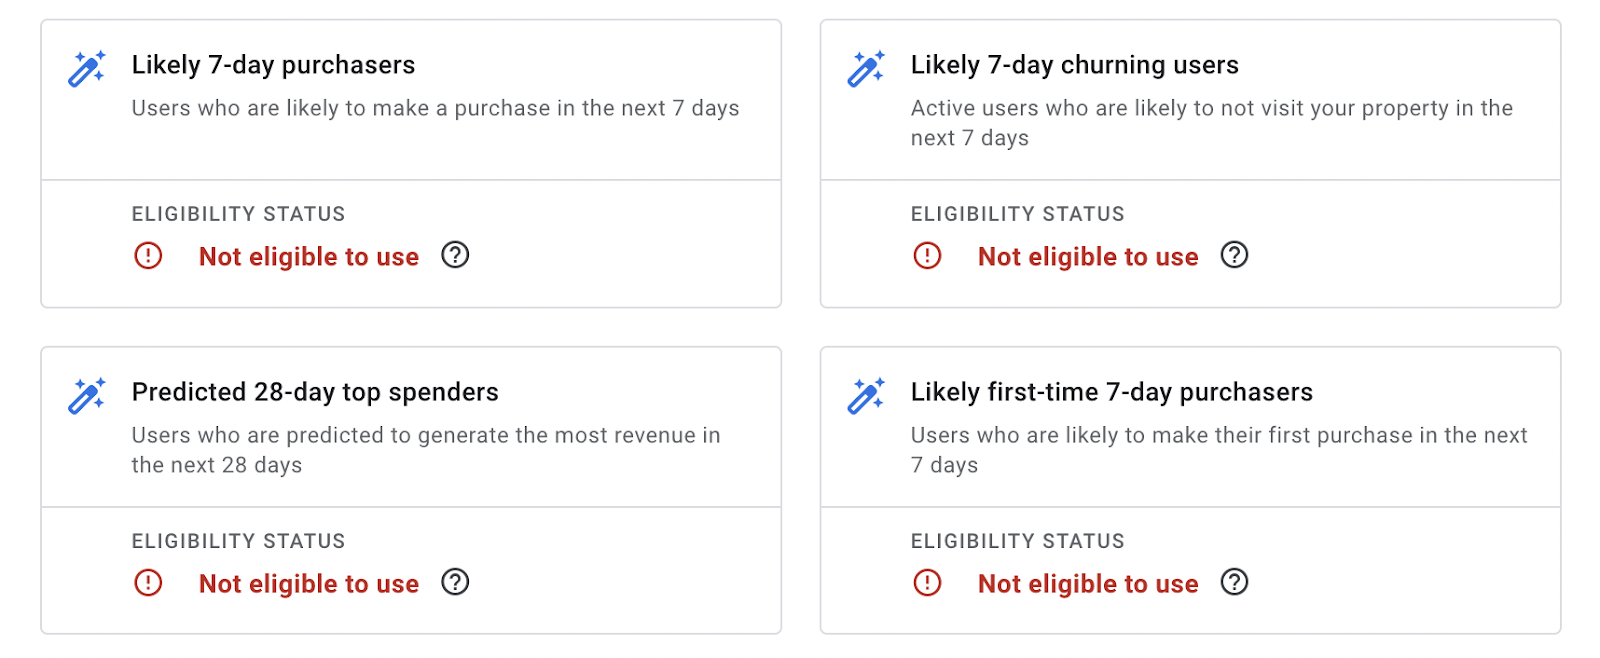
This section allows you to utilize suggested audiences which are popularly used by most businesses, some templates for you to create your audiences faster, and predictive audiences that utilize Machine Learning.
You can customize the suggested audiences that are under the ‘General’ section in detail while template configurations tend to be more straightforward. In the “Predictive” section, you might be met with the ‘Not Eligible To Use’ warnings even if you track purchases. That is because there are prerequisites in place so that your model will train to put out accurate results that will not mislead you. For example, your model will need exposure to positive and negative examples of purchasers and churned users. If not provided with sufficient examples, your model cannot make accurate predictions.
Apart from the eligibility errors, if you think you’re getting inaccurate results from your model, you can try tracking more events throughout your funnel as well as minimizing the noisy events that aren’t really meaningful for your domain of business.
How to Utilize GA4 Audiences
Once you are done creating your audience, users who fulfill the conditions will start joining it. Luckily, GA4 will populate your audience with users who have already fulfilled the conditions in the last 30 days if you have sufficient data instead of creating an empty list. You can now use your fresh audience for analyses and retargeting.
GA4 Reporting with Audiences
You can utilize your GA4 audiences in different ways to enhance your reports. Most straightforward way is by using comparisons. You can find the comparison feature on top of the each report under the Reports section. This feature is very similar to the segments in Universal Analytics. You can build a comparison by using the ‘Audience Name’ dimension and selecting the audience you’ve created.
If you wish to only see data for your audience you can remove the All Users audience. You can add up to 4 comparisons in total, with 5 conditions under each.
You can also use the filter feature included in some of the reports similarly.

Another way of using your GA4 audiences for reporting is by importing the “Audience Name” dimension in the Explore module into your custom reports.
Using GA4 Audiences in Google Ads
GA4 audiences can be imported into Google Ads by linking the two products. Linking can be done easily via GA4 Admin interface. However, simply linking your Google Ads account will not suffice. Under the ‘Data Configurations’ section of your linking details, you’ll find a personal advertising setting. Unless this feature is enabled, your audiences and events will not be available for use in Google Ads.

If this setting is enabled, you can find your audience lists in the Google Ads Audience Manager. Remember that it can take up to 24 hours for GA4 data to be available in Google Ads.
What Now?
If you’re just getting started with GA4 audiences, taking the time to create audiences allows you to focus on the most important sections of your visitors. A great starting point would be to think about your most valuable users or who you wish to target for your marketing campaigns and create audiences that only include those people. You can then jump into the reports and use comparisons to get a more detailed view of how they are finding you, what they look at, and if they convert.


Comments