Setting up Google Analytics 4 on Shopify Using a Custom Pixel
Loves Data
Setting up Google Analytics 4 (GA4) on your Shopify store is essential for tracking your store's performance and making informed business decisions. GA4 offers advanced tracking features and insightful reports that can help you understand your customers' behavior and improve your online marketing strategies.
Google Analytics 4 is the latest version of Google's popular analytics platform. It introduces a host of new features that provide more accurate and detailed insights compared to its predecessor. For ecommerce websites like those built on Shopify, GA4 allows you to track customer interactions across your site, giving you a clear picture of how users engage with your products.
In this tutorial, we’ll walk you through the process of setting up Google Analytics 4 on your Shopify store using a custom pixel. This method works independently of your store's theme, making it a reliable way to implement tracking without interfering with other parts of your site. You'll learn how to create and configure your GA4 account, add the custom pixel to your Shopify store, set up ecommerce tracking, and analyze your data to drive better business outcomes. By the end of this tutorial, you'll have all the tools you need to make the most of Google Analytics 4 and grow your Shopify business.
Creating and Configuring Your Google Analytics 4 Account
To start using Google Analytics 4 on your Shopify store, the first step is to create and configure your GA4 account. Follow these simple steps:
- Create a Google Analytics Account: Go to the Google Analytics website and sign in with your Google account. If you don't have a Google account, you'll need to create one. Once logged in, click on the "Start measuring" button to create a new account.
- Set Up Your Property: Enter the account name and click "Next." Then, fill in your property details. Choose "Web" as your platform, and enter your website name and URL. Select your time zone and currency, and click "Next."
- Configure Data Stream: Google Analytics 4 introduces data streams, a new way to collect data. Click on "Create Stream" and select "Web." Enter your Shopify store URL and stream name. Ensure that "Enhanced Measurement" is turned on to collect additional data, such as scroll tracking and outbound clicks.
- Access Your Measurement ID: After creating the stream, you'll see a Measurement ID at the top right of the screen. Copy this ID, as you'll need it to add the tracking code to your Shopify store.
If you’re getting started for the first time, then watch our Google Analytics 4 tutorial series to get up and running:
By following these steps, you’ll have your Google Analytics 4 account ready to start tracking valuable data from your Shopify store.
Adding the Google Analytics 4 Custom Pixel to Shopify
Now that your Google Analytics 4 account is set up, the next step is to add the custom pixel to your Shopify store. This method offers more flexibility and security than other methods. Here’s how to do it:
- Log in to Your Shopify Admin: Go to your Shopify admin panel and log in with your credentials. From the main dashboard, navigate to "Settings" and then click on "Customer Events" on the left sidebar.
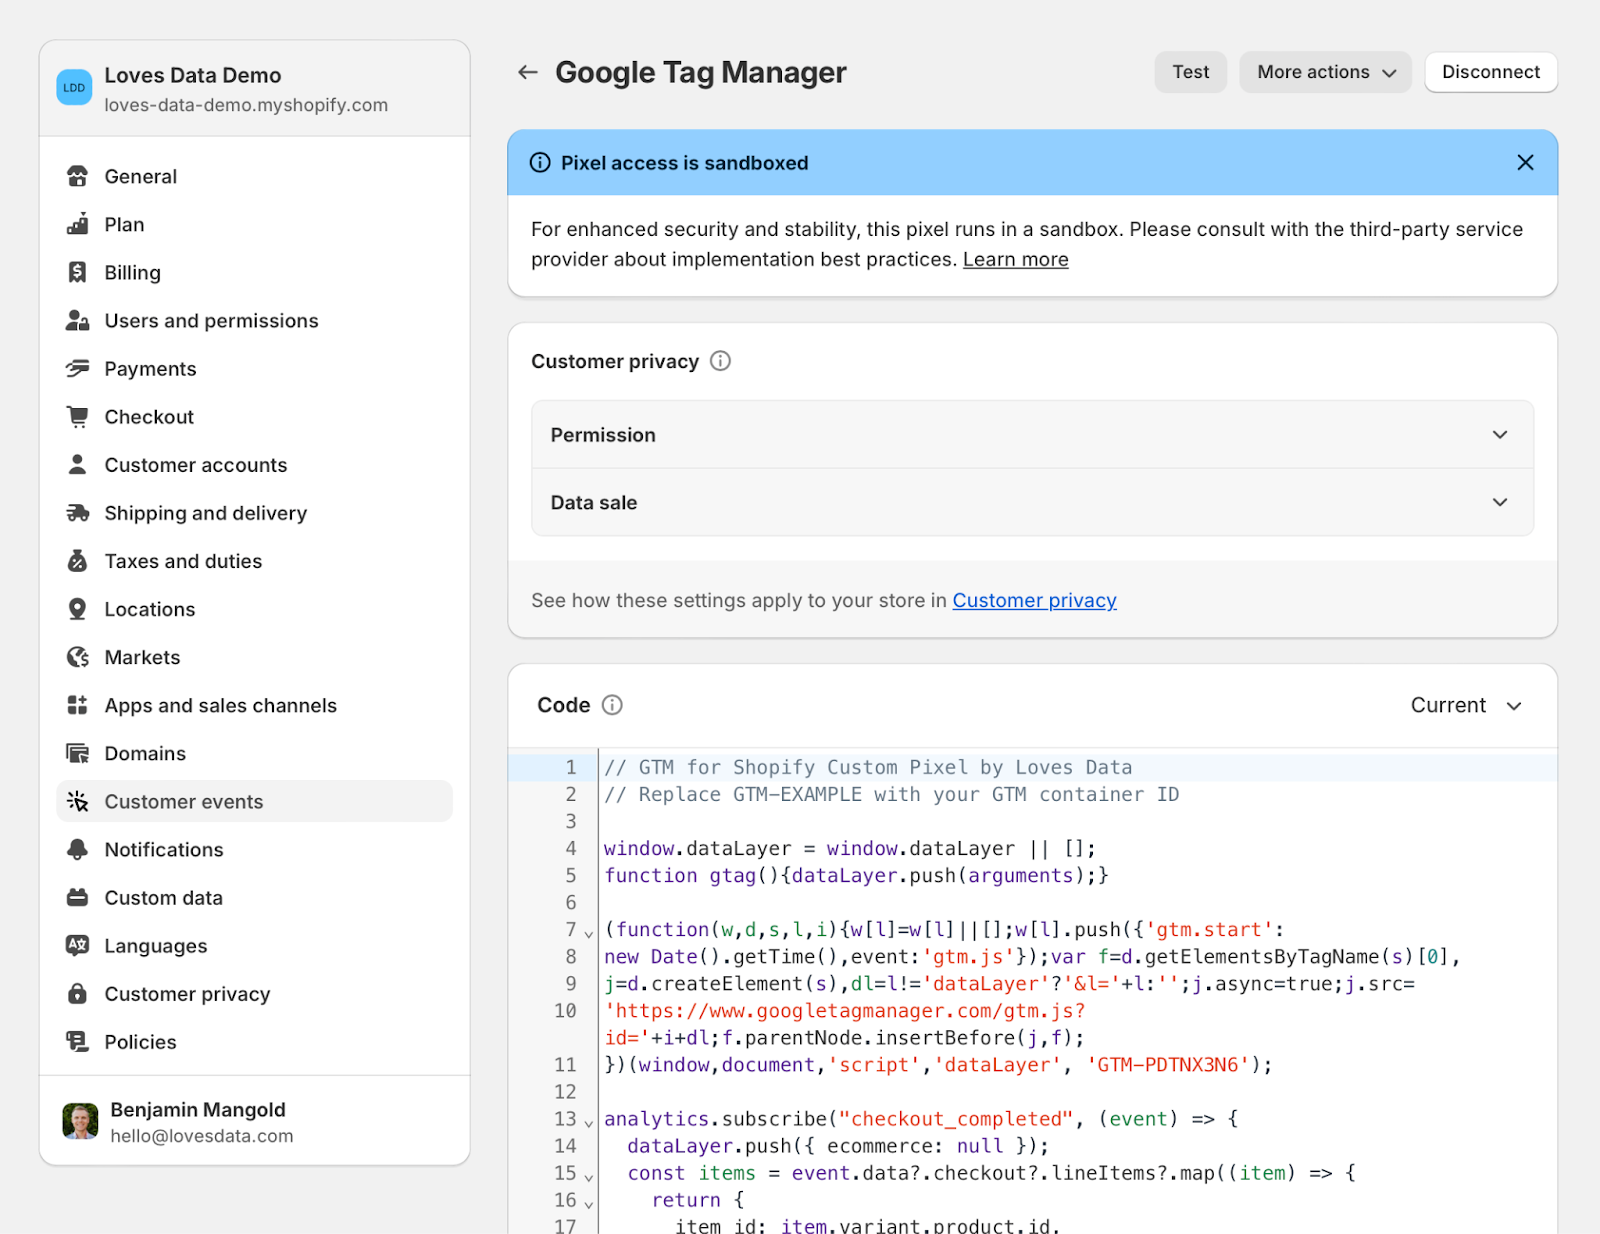
- Add a Custom Pixel: In the Customer Events section, click on "Add Custom Pixel." Name your pixel (e.g., "Google Tag Manager") and click "Add Pixel."
- Configure Privacy Settings: At the top of the custom pixel configuration, choose the appropriate privacy settings for your pixel. These settings control when the pixel will fire and integrate with Shopify's built-in cookie banner. If you're not using Shopify's built-in cookie banner, select "Permission: Not Required" to ensure the pixel fires for all actions on your site.
- Add the Pixel Code: Below the privacy settings, paste the code for your custom pixel. This code will include the Google Tag Manager container code and any specific tracking scripts you want to implement, such as ecommerce tracking. Ensure you replace any placeholder IDs in the code with your actual Google Tag Manager container ID, which you can find in your GTM account.
5. Save and Connect the Pixel: After adding the code, click "Save" at the top right corner. Then, click "Connect" at the bottom of the page to add the custom pixel to your Shopify store.
6. Verify Installation: To ensure the custom pixel is working correctly, use tools like the legacy Tag Assistant extension for Chrome or check the Realtime report in Google Analytics to see if data from your Shopify store is being received.
Watch our Shopify ecommerce tracking tutorial for an indepth walkthrough of the steps to setup your custom pixel and Google Tag Manager:
By following these steps, you will successfully add the Google Analytics 4 custom pixel to your Shopify store. This setup enables you to start collecting data and gain insights into your website's performance.
Setting Up Ecommerce Tracking
Ecommerce tracking allows you to capture detailed ecommerce data on your Shopify store. This feature lets you track product impressions, clicks, and transactions, providing a deeper understanding of your customers' buying behavior. Follow these steps to set it up:
- Install Google Tag Manager (GTM): If you don’t have Google Tag Manager installed, you’ll need to set it up on your Shopify store. Go to the GTM website and create an account. Follow the instructions to add the GTM code to your Shopify store, similar to how you added the GA4 custom pixel code.
- Create Ecommerce Tag in GTM: In GTM, click on "Tags," then "New." Select a tag type of "Google Analytics: GA4 Event." Configure the tag to track various ecommerce events like product views, add-to-cart actions, and purchases.
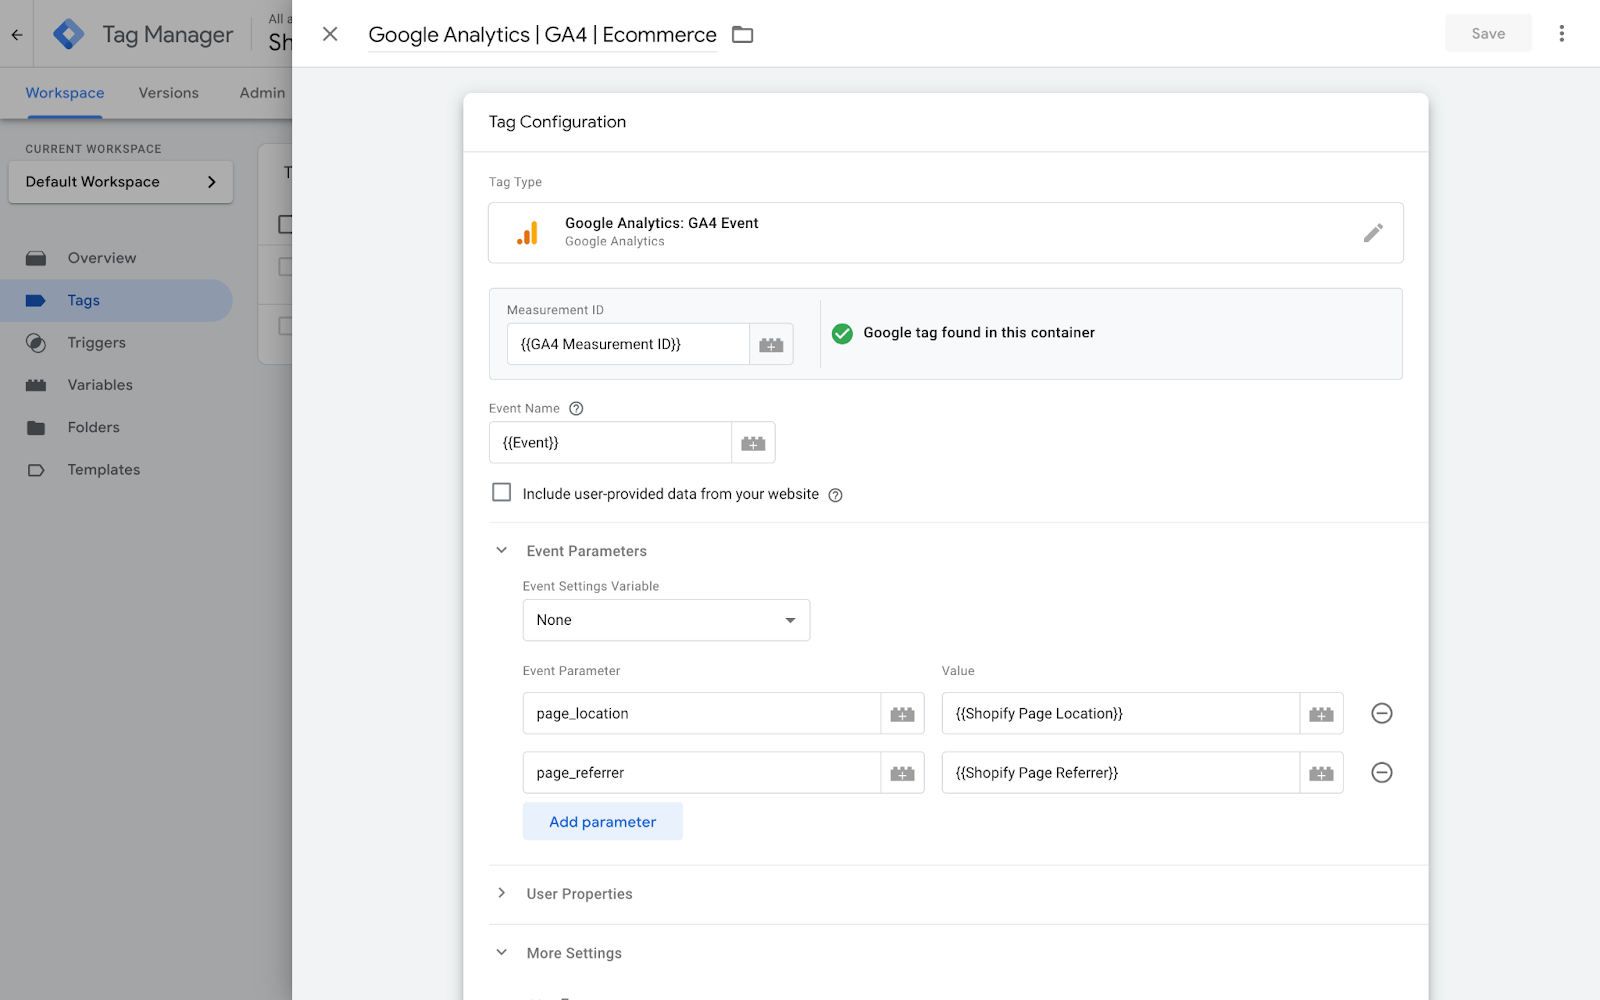
3. Set Up Triggers: For each tag you create, set up triggers to fire the tags based on user interactions. For example, create a trigger that captures when a product is added to the cart or when a transaction is completed.
4. Test and Publish: Use the Preview mode in GTM to test your setup and ensure that tags are firing correctly. After confirming everything works, click "Submit" to publish your container.
By setting up ecommerce tracking, you can gain detailed insights into your customers' shopping behavior. This feature helps you optimize your store and increase sales.
Analyzing Your Shopify Store Data with GA4
Once your Shopify store is integrated with GA4 and ecommerce tracking is set up, it's time to analyze the gathered data. Here are some key steps to get started:
- Check Key Metrics: In GA4, navigate to the "Reports" section to view essential metrics like total revenue, average order value, and conversion rates. These metrics provide a snapshot of your store’s performance.
- Use Custom Reports: Create custom reports to view specific data relevant to your business. For example, you can create a report to track sales by product category or traffic source.
- Analyze User Behavior: Use the "Events" section to see detailed information about user interactions. This includes tracking how many users added items to their carts or completed purchases. Understanding these actions can help you identify areas to improve.
- Utilize Funnels: Funnel analysis can show you where customers drop off in the buying process. Set up funnels to trace the customer journey from product view to checkout, and identify any stages where users tend to leave.
- Monitor Real-Time Data: The Real-Time report in GA4 helps you monitor live activities on your site. This is useful for tracking the immediate impact of marketing campaigns or new product launches.
Analyzing your Shopify store data with GA4 helps you understand your business performance and customer behavior. Using these insights, you can make data-driven decisions to improve your store.
Data-Driven Decisions: Integrating GA4 with Shopify
Setting up Google Analytics 4 on your Shopify store using a custom pixel is essential for making data-driven decisions. With GA4, you can track user behavior, understand your sales performance, and optimize your marketing strategies. By following the steps for configuring your GA4 account, adding the custom pixel to your Shopify store, and setting up ecommerce tracking, you’ll gain powerful insights into your online store’s performance.
Analyzing the data you collect is just as important. From checking essential metrics and creating custom reports to understanding user behavior and monitoring real-time data, GA4 provides the tools you need to make informed decisions. Using these insights, you can optimize your Shopify store to better meet your customers' needs and boost your sales.
If you’re looking to master Google Analytics 4 and other Google marketing platforms, Loves Data offers comprehensive online courses. Enhance your skills and grow your business by visiting Loves Data and exploring our expert-led Google Analytics course.


Comments