Getting Started With AdWords: Creating a Campaign
Loves Data
This post is part of our ‘Quick Start Agency Guide’ for agencies looking to setup and manage AdWords accounts. Checkout the full agency series:
- Creating an MCC account
- Creating a new AdWords account
- Linking a client’s existing account
- Creating your first campaign
Creating Your First Campaign
We will now run through a generic example of a branded campaign for a fictional client called ‘My Widget Store’. The purpose of this section is to outline the steps needed to create a campaign. It does NOT include the level of detail, best practices and considerations that we offer in our training - find out more about Loves Data's agency training.
From your MCC homepage, we will choose the My Widget Store AdWords account, either by using the drop-down at the top of the page or by clicking on the client name in the main table.
4-creatingfirstcampaign-01
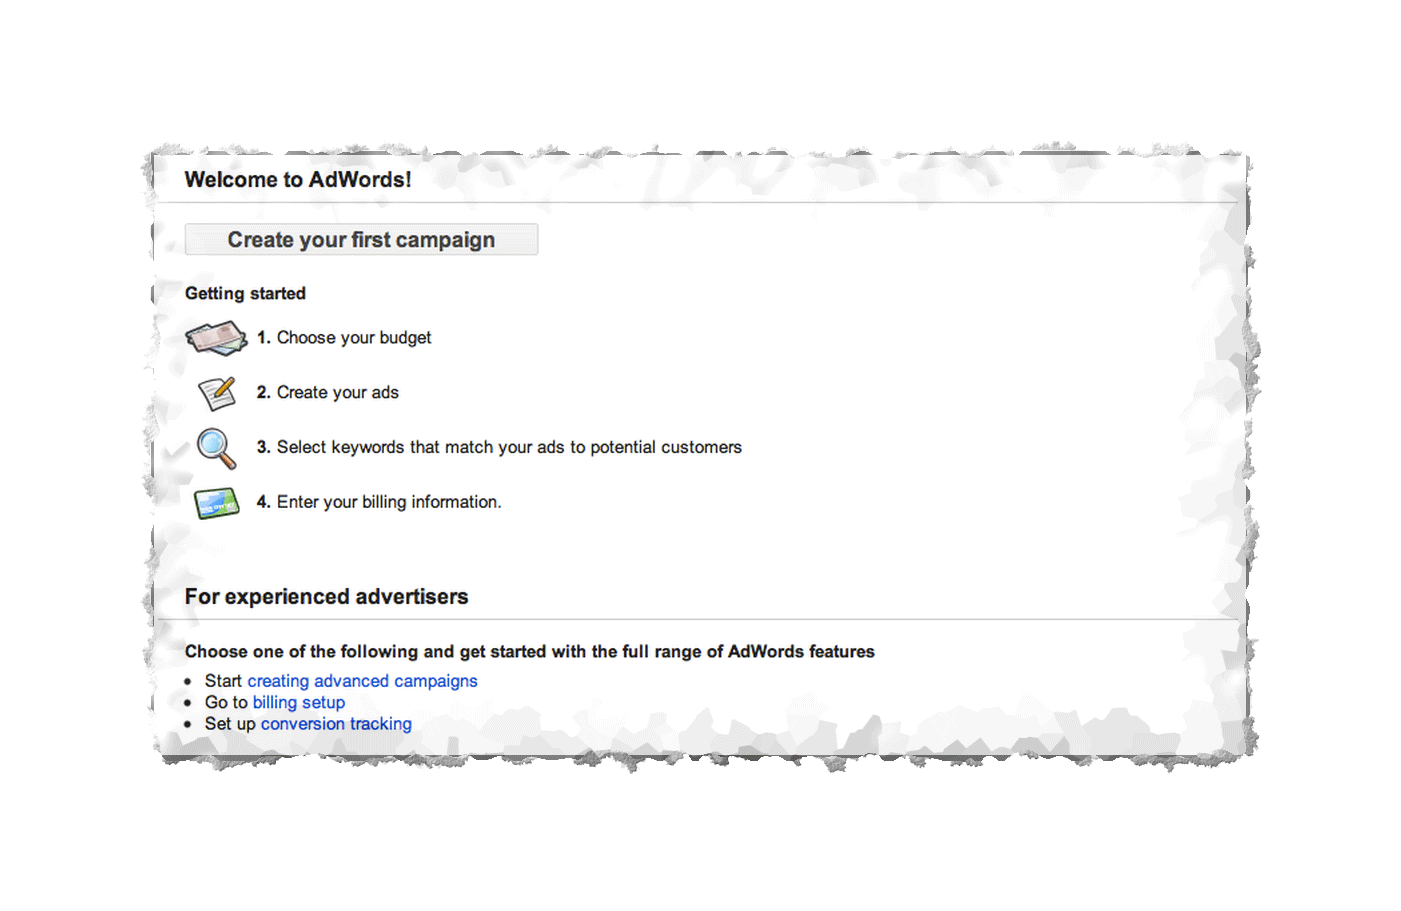
Since My Widget Store doesn’t have any campaigns yet, we can see a splash screen prompting us to create our first campaign:
4-creatingfirstcampaign-03
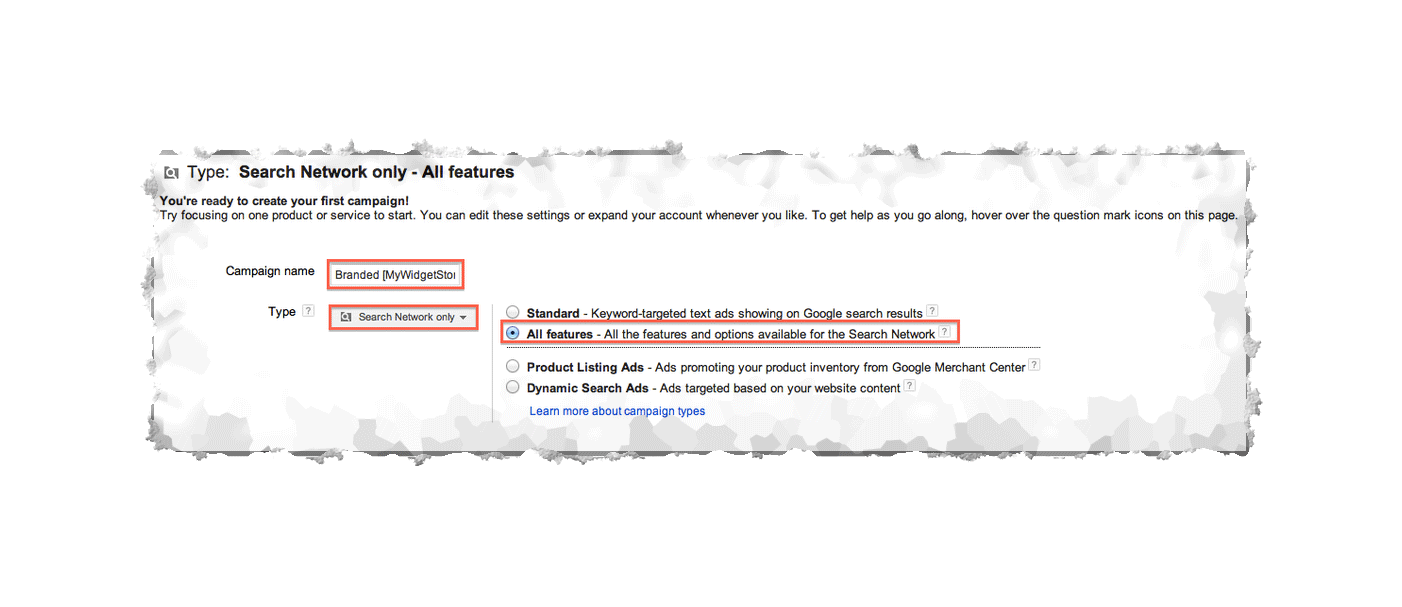
This campaign will be a branded campaign, meaning that it will only target users searching specifically for variations of the client’s business name on Google. Presumably, the account will then have other, more complex campaigns. The first step is to decide what type of campaign we’re creating. We have chosen Google Search to ensure that it’s not shown on the Display Network and the All Features subtype to have full control of the campaign details. We will also give the campaign a meaningful name.
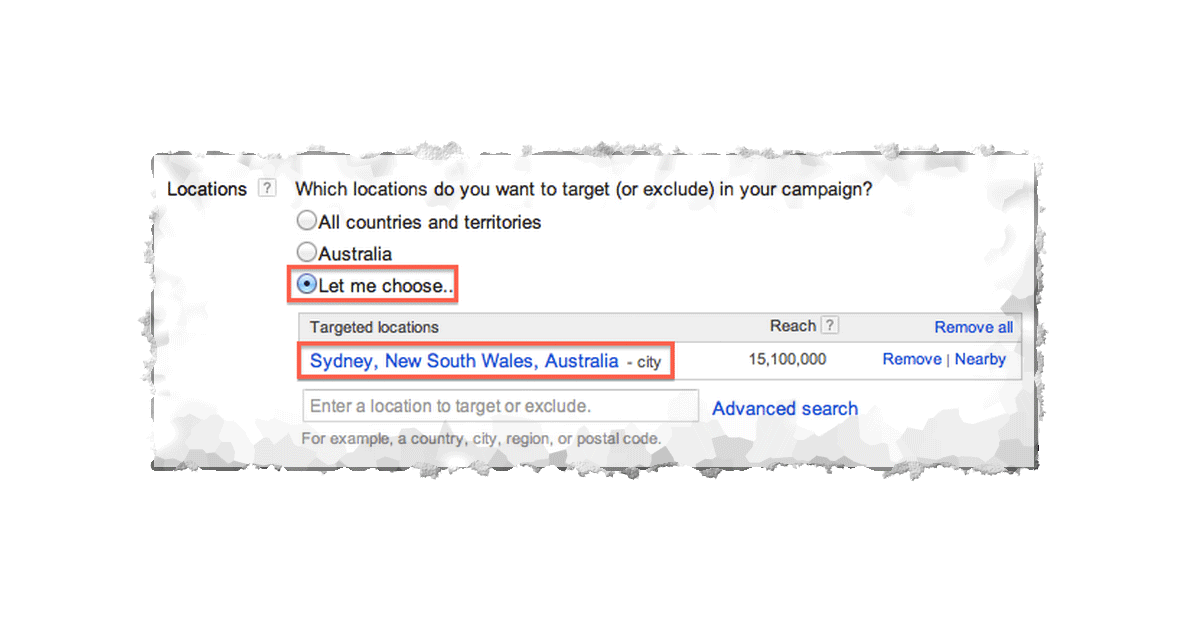
Next, we will choose what locations we want the campaign to target. Since our fictional client is Sydney-based, we will type Sydney into the search box and select it (making sure to choose Sydney Australia and not any of the other Sydneys around the world):
4-creatingfirstcampaign-05
4-creatingfirstcampaign-04
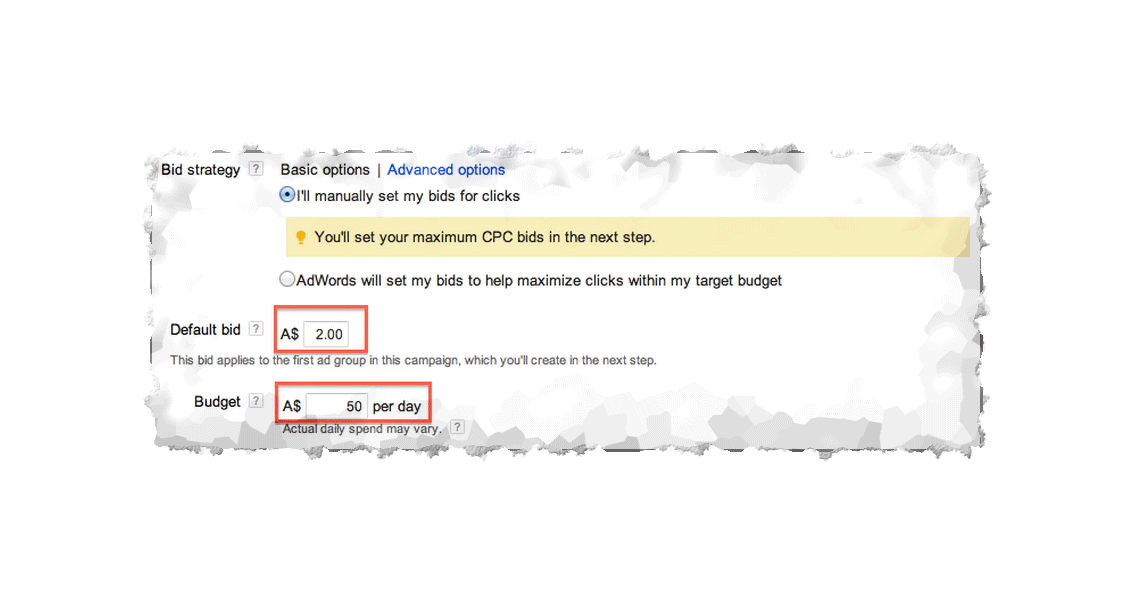
Next, we will be setting the bidding and budget options. Our client has $50 a day to spend and we will use manual bidding, paying a maximum of $2 a click:
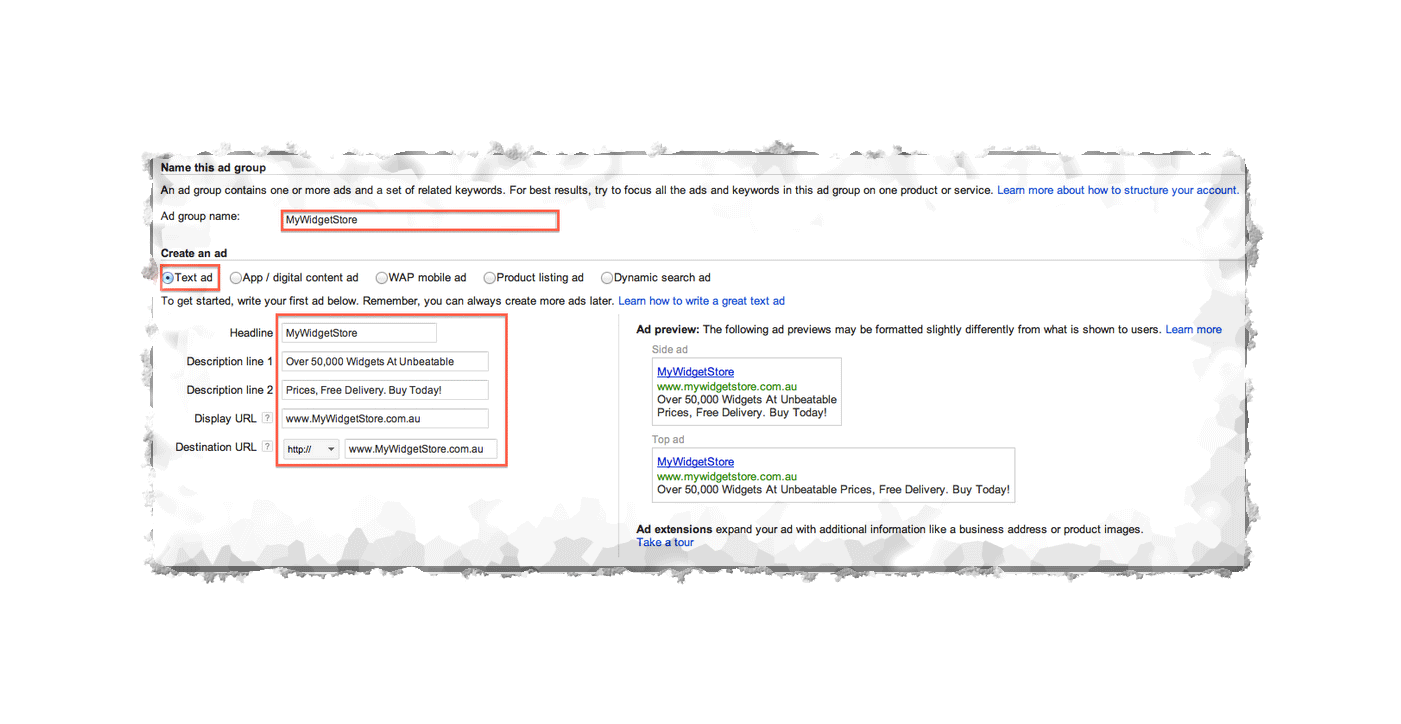
Once the campaign settings have been locked down, we will create the first ad group in the campaign. We’ll name it MyWidgetStore and write a text ad in the form provided, paying attention to how the ad will look in the ad previews that Google provides.
4-creatingfirstcampaign-06
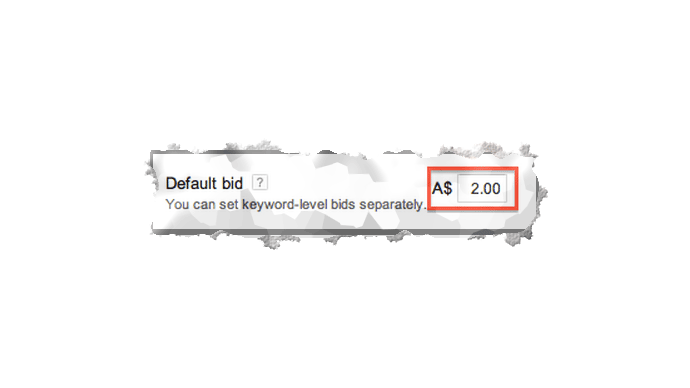
We will then add keywords relevant to our ad group theme to help Google match our ad to various user search queries. We will also set a default bid for the ad group.

4-creatingfirstcampaign-06
4-creatingfirstcampaign-07-2
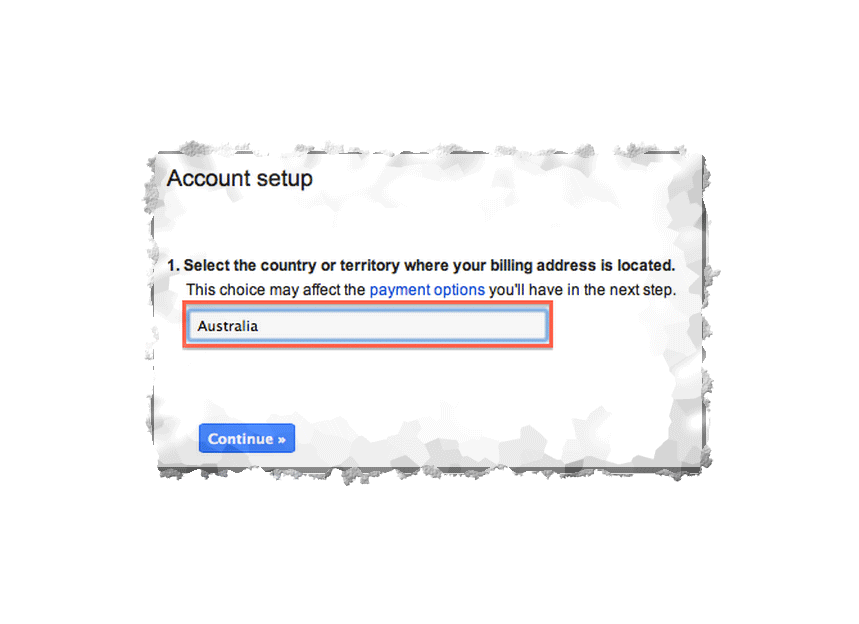
Before our first campaign can be made live, we also need to finalise some billing and administration items. (Note that this only needs to happen once for each account.) We must first select the country where the billing address is. This will impact the billing options that Google makes available.
4-creatingfirstcampaign-09
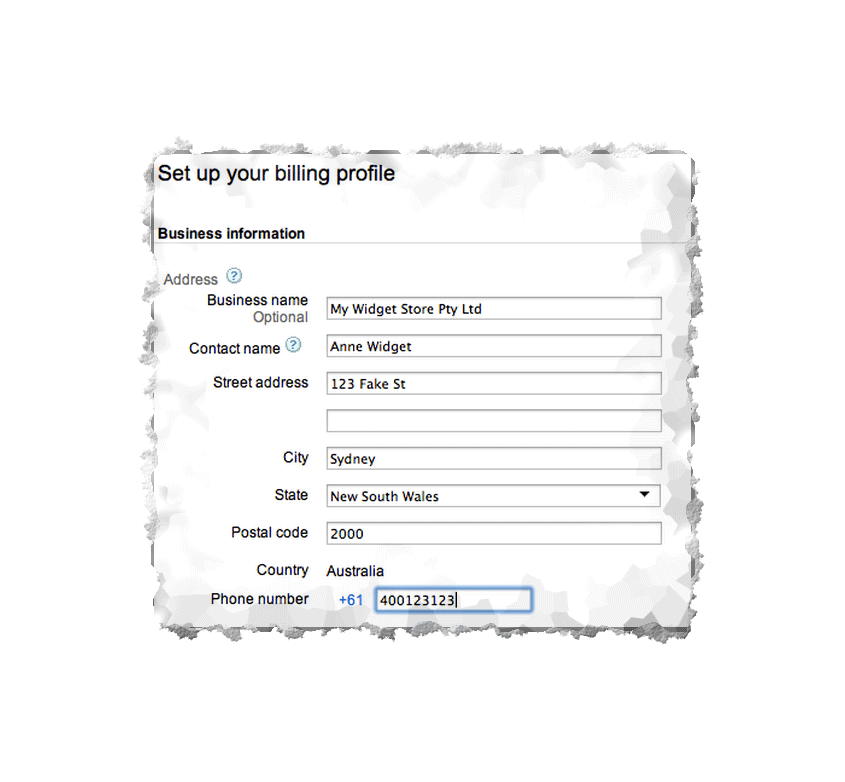
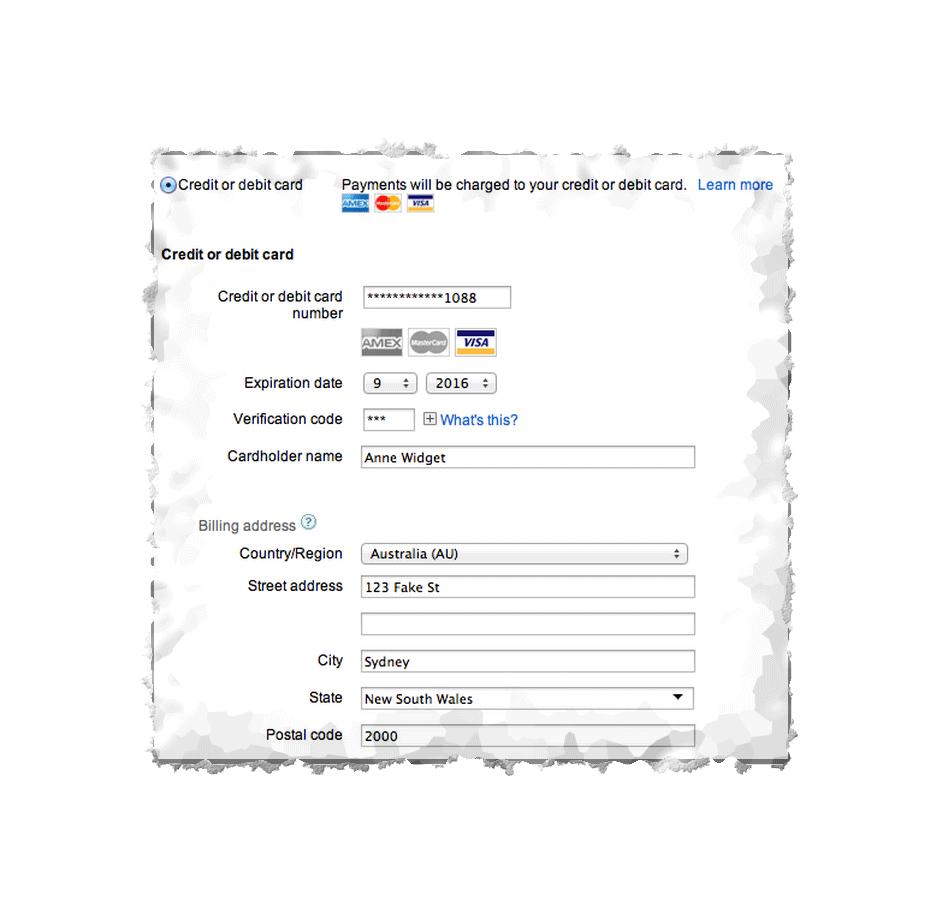
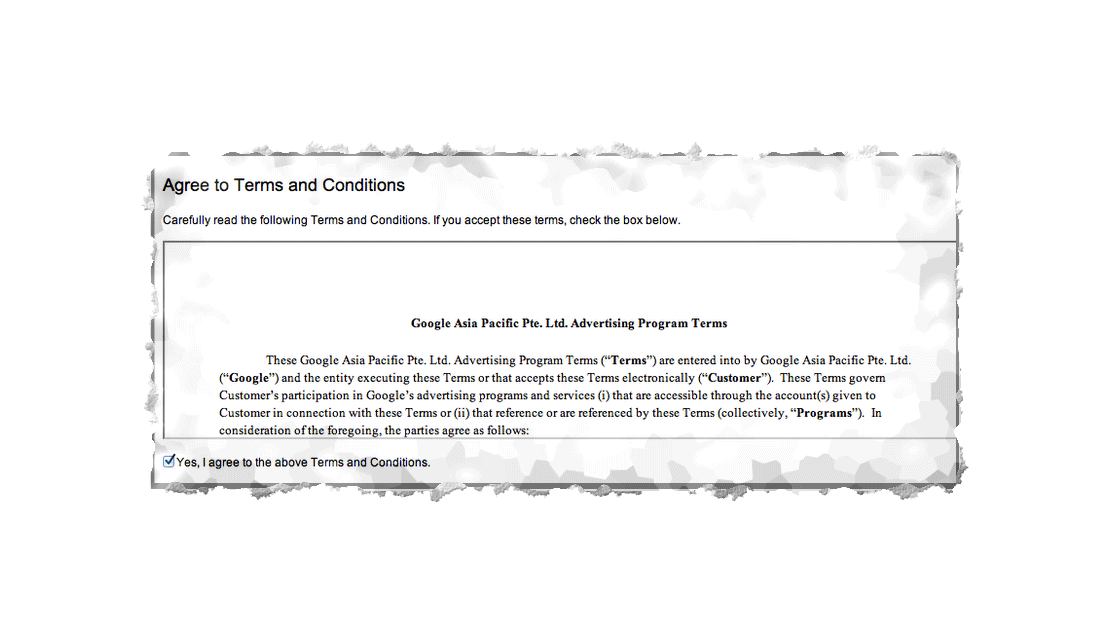
We will then enter the billing address and some payment details and accept the legally binding terms and conditions of our AdWords account.
4-creatingfirstcampaign-10
4-creatingfirstcampaign-11
4-creatingfirstcampaign-12
4-creatingfirstcampaign-13
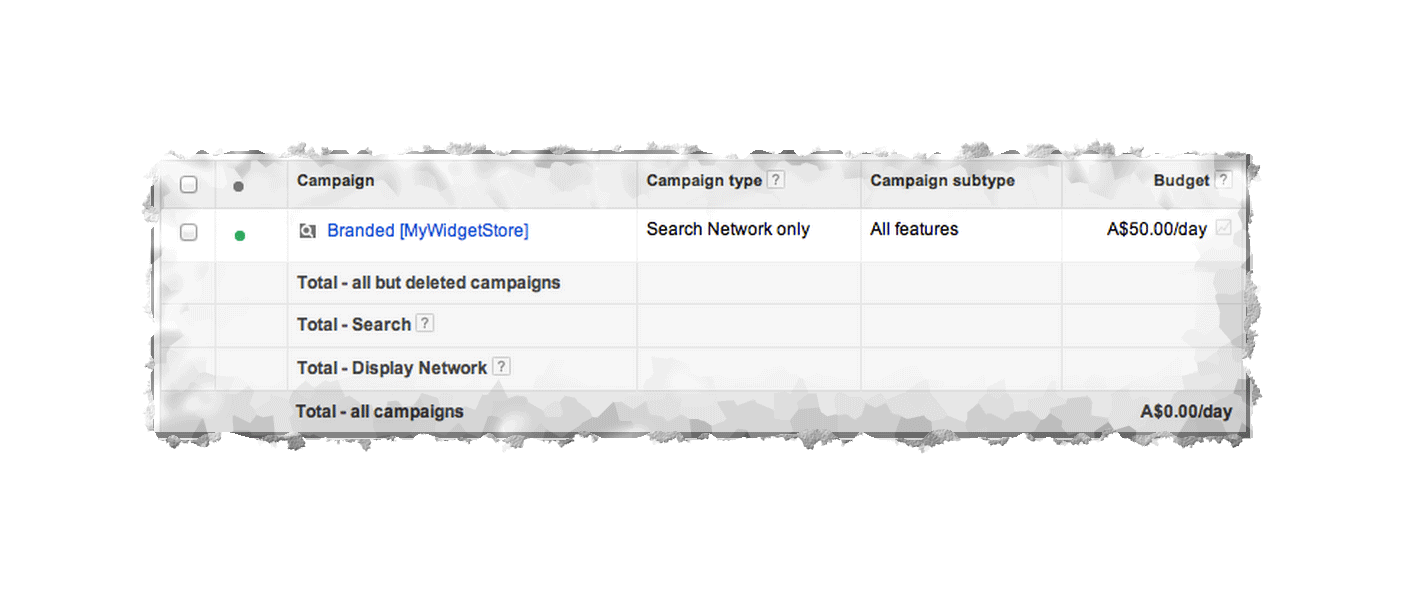
The account’s campaigns list will then consist of one campaign with the status of active (as indicated by the green status circle to the left of the campaign name):
We hope this guide has provided some background if you need to get started in your AdWords setup! If you would like to go more in depth with AdWords, best practices, and strategies, find out about the Loves Data Agency Training.


Comments