A Beginners Guide to Google Tag Manager Environments
Loves Data
For a long time now, Google Tag Manager’s given us the ability to easily create and modify website tags in a matter of minutes and we love it. The ability to create and publish tags onto a website are a couple of aspects to Google Tag Manager, testing and debugging is another important aspect that every user needs to consider. Before we dive straight into Google Tag Manager environments, it's important to first understand how Google Tag Manager's version control works.
Version control
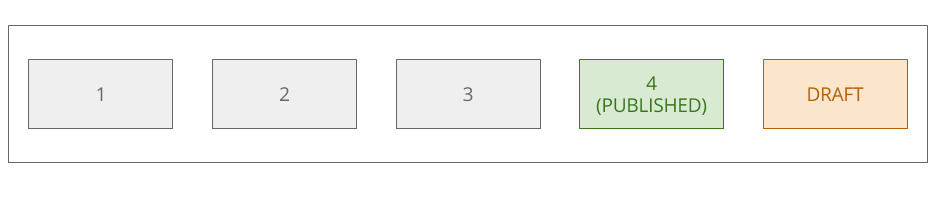
When a new tag is created (or an existing tag, trigger or variable is modified) the changes will always apply to the draft version of your Google Tag Manager container. The draft version doesn't immediately apply to the live website unless until a new version is created and then published. Each version of your Google Tag Manager container is numbered and this will increment every time you create a new version. While you would usually have the latest version published, Google Tag Manager also gives you the ability to republish older versions of your container – this feature is essential for Google Tag Manager environments.
Environments
Until very recently, Google Tag Manager only allowed you to publish one version of your container. Which also means for every single website you have the Google Tag Manager snippet embedded, it will behave exactly as you'd expect it to on those websites – which itself isn't a bad thing
The problem When we start considering enterprise-grade websites where there are multiple versions of the same website, (e.g. beta, pre-production and production) tag deployment and quality assurance will be dependent on the individual website environment. Consider the example below:

- Both are copies of the same website
- Both use the same Google Tag Manager container
- The live website is accessible by the general public, while staging website is only accessible by internal developers, testers and other authorised users
- The staging website contains incomplete or untested website features, whereas the live website is feature complete and has undergone rigorous testing
In the above scenario, you wouldn't implement an incomplete feature onto the live website for general consumption because it's incomplete, bad for user experience and plain silly. So why would you publish tags for the incomplete website features on the live website if they don't exist? Fortunately, Google Tag Manager's here to help us out.
Google Tag Manager environments to the rescue As in the scenario above, we can create divide our Google Tag Manager container into separate environments and publish different versions of your container for each environment. This will allow you to publish more than one version of your container at the same time and makes testing and debugging your tags a whole lot easier.

In the scenario above, we have two environments: live and staging. The live environment will contain the same tags that we want to fire on the live website, and the staging environment will include additional tags that are either undergoing testing or are not ready to be published in the live environment.
Getting started
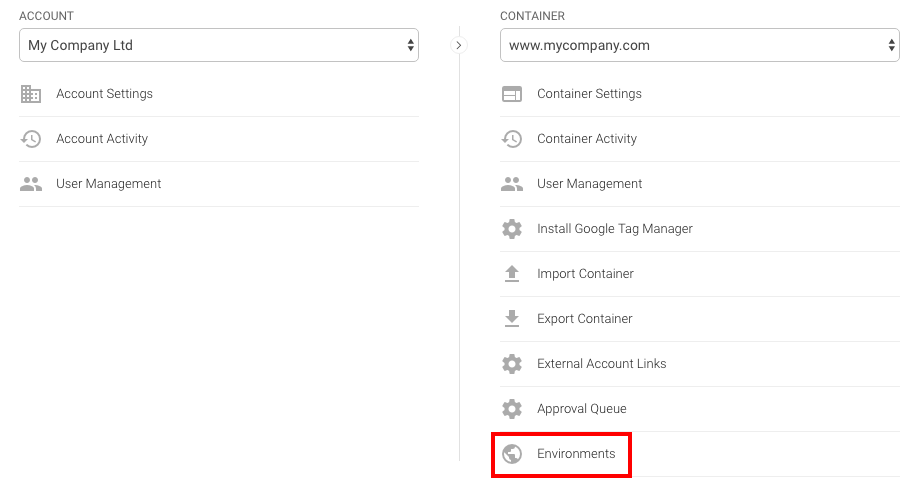
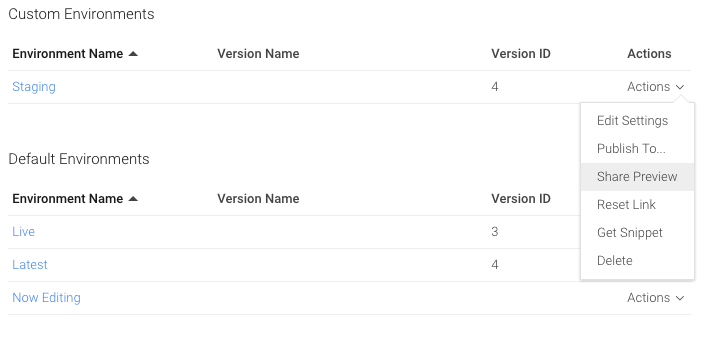
To access the environments in Google Tag Manager, navigate to the "Admin" section of the interface and open the "Environments" menu under the "Container" settings.
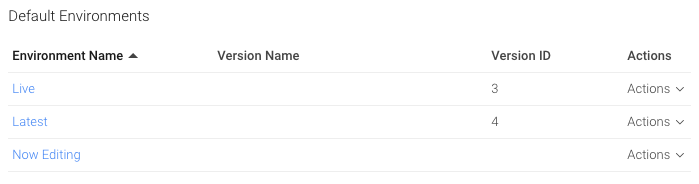
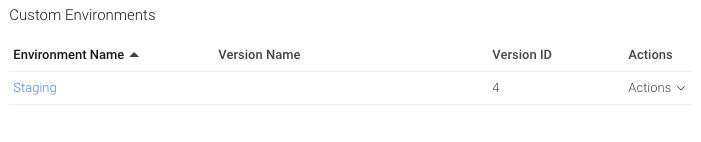
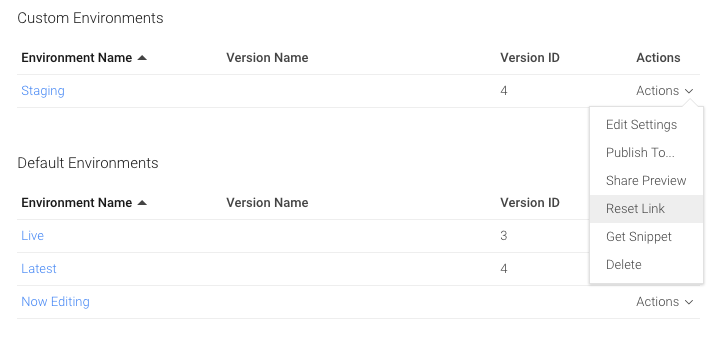
Google Tag Manager helps you get started by providing three default environments.
To briefly describe these environments:
- The Live environment always points to the container version that's been published.
- The Latest environment always points to the latest container version that's been created, however, it may not necessarily be the same version that's live (as you can see in the screenshot above).
- The Now Editing environment always points to the draft container.
Of course, you're not limited to only using these environments, Google Tag Manager also gives you the ability to create your own environments.
Create your own environments
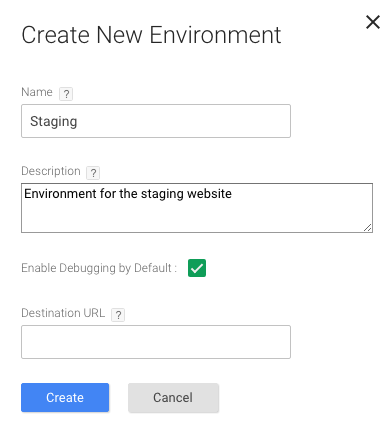
Creating environments in Google Tag Manager is really straightforward, simply clicking "New" will bring up the following popup.
As shown in the screenshot above, we recommend at least providing a name and a description for your new environment so that other users of your Google Tag Manager container will be able to quickly figure out what the environment is used for.
TIP: If this environment is used for testing and debugging purposes, then we also recommend ticking the "Enable Debugging by Default" checkbox as this will bring up the Google Tag Manager debug console by default. When you've created your new environment, you’ll need to publish a container version to it, and Congratulations – you've created your first environment.
IMPORTANT: unlike the default environments that dynamically change according to whatever version of your Google Tag Manager container is live or the latest, custom environments will always load the same version unless you explicitly change the version that's published to it.
Using environments
Now that you've seen the different default and custom environments, let's start using them. Google Tag Manager provides two methods to use your environments.
Option 1: Share preview mode Similar to the normal share preview functionality, you can share previews to your environments by selecting the option under the "Actions" dropdown menu.
Option 2: Embed environment snippet on website Alternatively, you can get a special Google Tag Manager snippet and insert it onto all pages of your staging website.
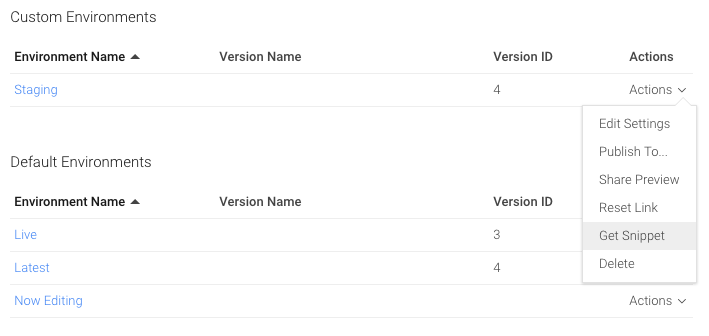
The environment snippet is very similar to the standard Google Tag Manager snippet, the only difference is that it will load the version of the container that you've specified (rather than the live environment) and if you selected "Enabled Debugging by Default" when you created the container, it will also open the Google Tag Manager debug console as well.
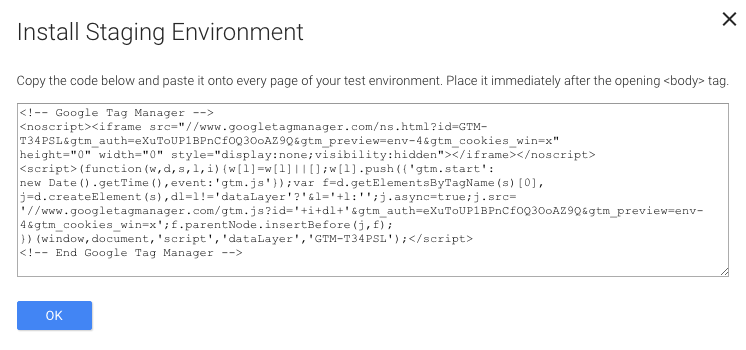
IMPORTANT: don’t install the environment container snippet alongside the standard container snippet on the same website.
Other tidbits
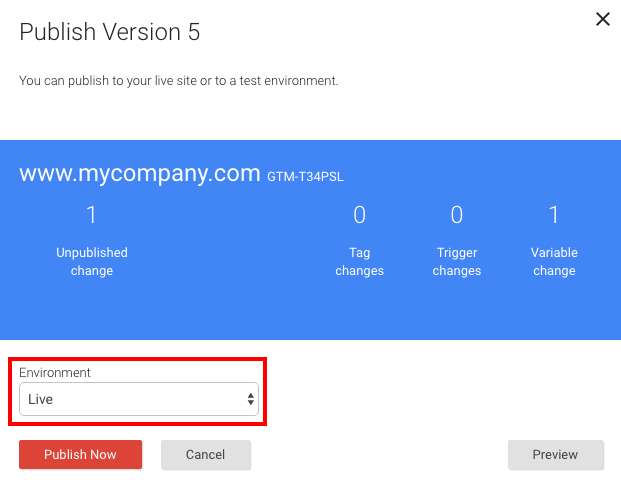
Publishing versions Once you've created a custom environment, the "Publish" menu changes to give you an option to select which environment you want to publish the version to. This is a quick and easy way update the container version each environment loads.
Resetting environment link Resetting the environment link will invalidate the preview URL that you would have shared with other users in the past. This can be useful in situations where you've previously shared a preview of an environment to another user in the organisation and they have since left the company. However, do proceed with caution as this will also invalidate the environment container snippet which will then need to be updated.
This can be done by selecting the "Reset Link" option in the "Actions" dropdown menu.
And that's it. How are you using Google Tag Manager environments? Let us know in the comments below.